Archive for August, 2014

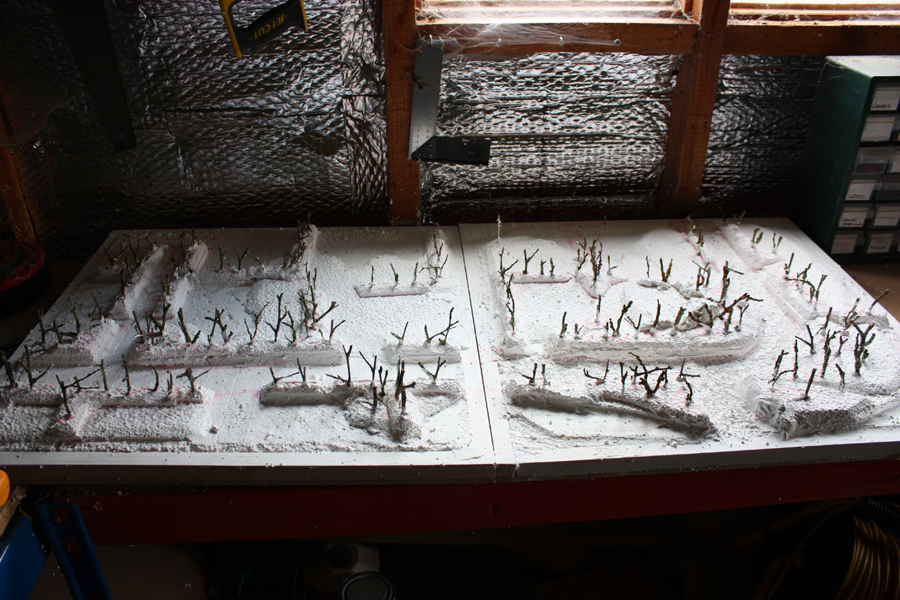
This is just an update so please don’t get hung

up on the colours as I know they are not quite

correct. The colours I`m talking about are the

various shades of green on the board in the pictures.

I`m still very much in the building up the foliage stage

of things and I intend to correct some of the brighter

colours(eg bright green moss) by toning them down with an

airbrush.

Click on a picture to enlarge:

IMG_7220a

IMG_7221a

IMG_7222a

IMG_7226a

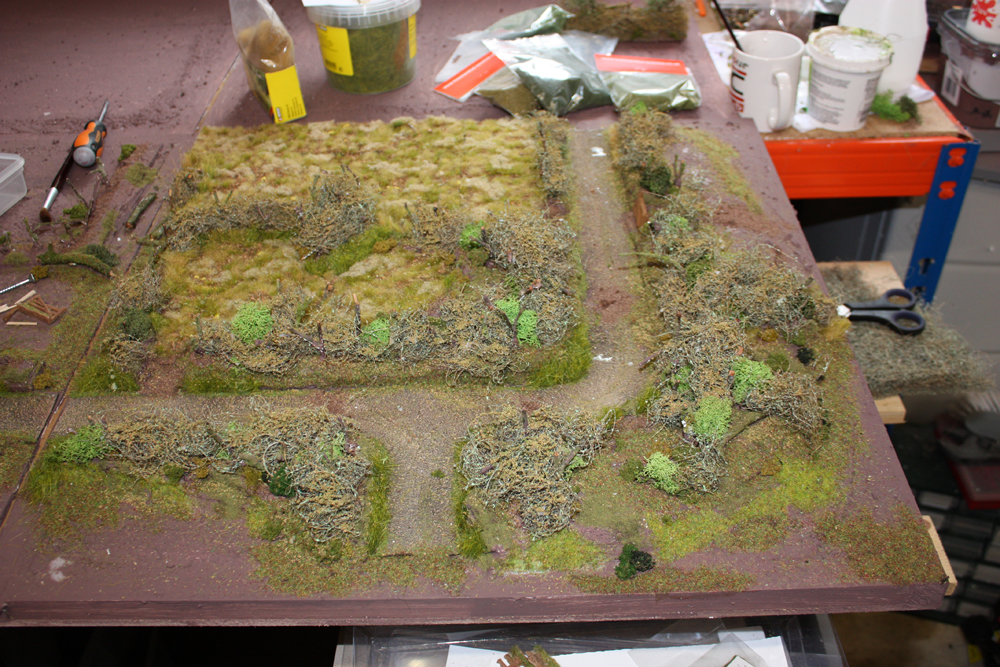
I plan for telegraph poles, road signs, fences, gates and

anything else you care to mention.

I am aiming to get a main road on the other two boards

running parallel and large a farm by http://www.lasermodellbau.de

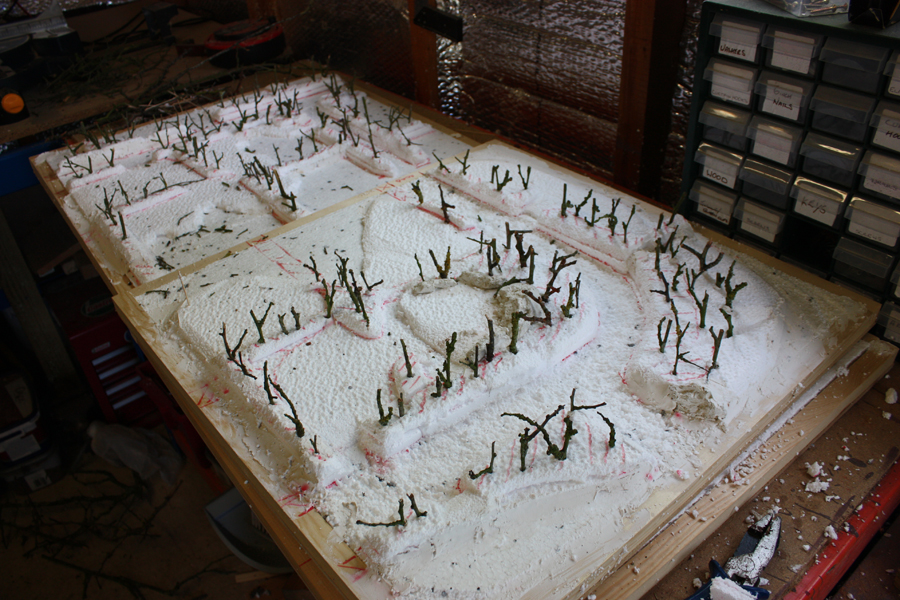
A word on some of the scenic material being used. I`m

loving using the tall grass by Noch and the large, rough,

open area is a job lot of Model-Scene scree.

Next step is to get some trees into that bocage.

Until next time 🙂

Next stage was a coat of masonry paint over all

the styrene. This seals the styrene and gives a bit

of texture.

Just click on a picture to get a bigger image.

IMG_6944a

I followed up the masonry coat with a coat of brown

household paint. The brown will act as the base, earth

coat. Please note I get all my paints from my local DIY

store and they always have a shelf with reduced price paints

on them. Just imagine the amount of people who bring paint

back because its not the exact colour which is great for

modellers as it means bargain low price paint 🙂

IMG_7108a

You have probably noticed some ready made roads in the

photos. They are made by Fatfrank(ebay seller name) and I

have had them in a box for over a year ,just waiting to be

used on such a project. Saying that I`m not sure if they look

the part ?

Next I started adding scenic materials to build up the

countryside look. This is going to time so I will start

on the hedge bases first and then spread out.

IMG_7159a

IMG_7162a

As I mentioned early days with the scenic build up

but I have started.

More soon 🙂

Slow progress on the boards but progress is

being made.

Ok so next thing I did was mark up with a big

red felt tip pen a general outline of where I

wanted everything to go.

Click on a picture to enlarge:

IMG_6210a

As you can see I had some help from a passing

Panther tank.

Then I started scraping out the styrene road

route using a screwdriver and sharp knife. I

also put down a tile size layer of styrene to

help build up the scenery.

IMG_6215a

IMG_6219a

The tile layer is built up using more tile

where required and is stuck down again with PVA glue.

The cocktail sticks are used to temporarily hold things

in place while the glue sticks.

IMG_6221a

The next part of the plan is the foundation for

the bocage hedges. As far as I`m concerned bocage

has just as much tree in it as hedge. So I`m using

twigs as trees and sticking them with glue into the

hedge lines. They will help the horsehair bocage stay

in place.

IMG_6420a

IMG_6421a

Some of you have probably noticed that my boards

have a permanent look about them. The plan is to make

the terrain 50/50(half fixed/half moveable).

Anyway that’s it so far.

I needed something to haul my anti tank guns

and the Loyd Carrier was the answer. These are

Battlefront models and very simple to paint up and

only needed a slight modification here and there just

so they didn’t all look exactly the same. I have added a

few extra troops as well. Once again its 11th Armoured

colours.

Click on a picture to get a bigger picture:

IMG_7136a

IMG_7137a

IMG_7138a

Cheap to make, easy and light to tow and quick

to set up. Whats more the 6pdr could penetrate 68mm

of armour at 1000 yards, so good enough to deal with

Panzer IV`s.

These are once again Battlefront models and as you can

see I have only managed to complete two so far. I also need

a command team to go with them.

Usually towed into battle by a Loyd carrier 🙂

Click on a picture to get a larger picture:

IMG_7145a

IMG_7146a

Untitled-11

Untitled-12

Another £2.65 well spent and a great looking

truck just ready to pull a 5.5 inch gun. I did

a few modifications before painting including

adding a rolled up tarpaulin cover, front tow rope,

front load weight sign, front lights and a small step

up ladder over the fuel tank.

Click on a picture for a larger image :

IMG_6981a

IMG_7140a

IMG_7141a

IMG_7142a

After reading up on the history of 11th Armoured

in Normandy it seems the artillery came to the rescue

of many allied units in combat and in some cases

literally were the difference between winning and

losing the fight. So bring on the Sextons and my

infantry will be forever more protected by a shield

of HE. One thing that I am still unsure about is

the nationality of the Sextons as 11th Armoured used

and requested artillery help from any and all batteries

available. So even thought they have 11th markings they

could quite easily be British or Canadian.

Click on pictures to enlarge:

IMG_7127a

IMG_7128a

IMG_7132a

Are bigger tanks better ?

Posted: August 9, 2014 in 1/16, R/C
Tags:

Seems like I have been painting all summer and Jack

becomes a boring guy without some fun.

So spent a bit of money and bought myself some 1/16

remote control mayhem.

Answering the question in the title, “hell yes” if its a

Heng Long 1/16 scale remote control Sherman beast.

Click on a picture to get a huge version:

IMG_7115a

IMG_7116A

Oh before somebody mentions I should of bought a Tamiya

1/16th R/C unfortunetly I did`,t have £500 spare:(

Only one small problem, explaining to the Mrs about the dug up

sections of the garden that look suspiciously like bunkers and

I now feel I need a Tiger:)