Archive for the ‘Project’ Category

Small update of the project so far. The pictures taken show the first time I have put the whole thing together with surroundings just to get a feel for the project and how it all links together. Lots of work still to do inside and the roof needs a bit more work but apart from that its coming on nicely.

Chateau Saint-Gilles

Very quick update of the progress so far. All my attention has been on completing the roof

and internal roof space. The 1/48 scale Citroen parked outside is just a guide for scale.

Next up is prepping the ground floor for some interior design work and painting.

A much needed update on my chateau project. Things have finally started moving again as I have cleared by back log of painting during the covid 19 lock down.


As you can see, I have been working on the ground and second floor and have just started on the third floor and attic space. It still looks a bit Heath Robinson at this stage but once I get some paint on it will come on really quickly. One thing that has surprised me is the sheer scale of it as it comes together. I wanted a scratch-built Chateau as nothing on the ready built market ticked the box in size or detail, even so this going to be a beast.


Things that have slowed me down are the planning of how everything will fit together and allowing access to all rooms and spaces for figures. Its difficult making whole floors that can be separated for game play and structurally solid at the same time, especially in foam card.


Interior design will include marble floors using marble effect sheet, wooden flooring using model boat planks and dolls house wall paper for a lot of the rooms. Fire places have been scratch built and I intend to fill out every room but in a moth ball type state if that makes sense. So white sheets over chairs etc etc.
Big thankyou to my laser cutting friend who was responsible for turning my very basic diagrams into some fantastic looking windows and doors.


Next challenge will be the roof which is a Mansard and the dormer windows protruding from it. The roof will most likely be the most complicated part of the building and I think it will test my limited building ability to the max. Wish me luck.

Just a small update of progress being made during these strange and worrying times.

The picture is of a mock up for the front entrance of the chateau before I start

gluing things in place. I have an excellent contact who is able to make most

things from laser cut mdf and he is responsible for the brilliant doors and windows.

I now have a large ready made supply of doors and windows for the project so things

should start to get a move on shortly.

After the success of my foam card French house project in 2019 I have

decided to be a bit more adventurous and go the whole hog and build

a chateau. I love individually built terrain as it brings something

unique to the table top, that combined with a desire for centre piece

for the table fits perfectly with the idea of building a chateau.

On top of this a lack of ready made buildings is driving me on and

the strange discovery of a beautiful abandoned chateau online has

aroused by creative curiosity.

I discovered the beautiful abandoned chateau online while searching

for images. It turns out there is unique bunch of urban explorers who

specialise in discovering and photographing derelict and abandoned properties.

The details of many of the places are kept secret as once a location is

known it often becomes vandalised. Luckily with a bit of research I was able

to locate the said chateau on google maps helping me get a better idea of

the layout. Sorry the chateau location stays a secret and my chateau name

is fictional.

So progress so far is slow, but its a start and I’m finding the scale

and complexity challenging for my basic ability.

I have measured the whole thing out and drawn a master diagram. I have

also started cutting out the ground floor walls. On top of this I have

started on some of the internal room features such as fire places etc.

I am presenting working on the internals wall and will post up pics

shortly.

Chateau diagram

Right, a big update on what I have been up to so far.

First up I have completed painting 13 Fallschirmjager from Foundry and another

six from Warlord, all metal. There is a nice mixture of postures and the two manufacturers

go well together. Please note the flame thrower and Panzerschreck figures came with the group so

I painted them up as well even though I am not aware of these types of equipment being used in the

invasion of Crete but they would of been present with the occupation force later on.

Next is two small buildings from Charlie Foxtrot models. Both come from the pan tile Italian range but

fit perfectly into any Mediterranean setting. I added a scratch built trellis for the outside of one

building as I found a really nice picture of a similar building being used as make shift field hospital

with injured troops recovering under the shade. It also gave me a chance to finally use the pink

scatter and create a beautiful Bougainvillea climbing up.

I have also started on two DFS 230 gliders. One is from Sarissa(28mm laser cut) and the other is plastic kit by Hobby in 1/48 scale. The strange thing is that the 28mm kit is bigger than the 1/48 kit and I have measured both and the 1/48 is very accurate for scale.

Finally I have started converting a Sarissa aerial kit into a radio transmitter station.

I have now painted up a small squad of Warlord Games figures. These figures are labelled mid-late war by Warlord Games but as long as you ensure they have the right weapons for the period they can easily fit it. At the time of the invasion of Crete new uniforms were starting to come through to the troops on the ground, specifically camouflage tops and helmet covers. There are lots of pictures of Germans on Crete wearing mixed uniform. Please note I have not confused the later pictures of occupation troops wearing camouflage which is a common mistake, often made.

I must admit of the all the figures painted so far these are my least favourite. They are plastic
and seem clumsy as in the way the bodies are sculpted. Whats also apparent is Warlords Heroic scale
which shows up the large oversized heads.

They will also need a weight added to the bottom as they are easily knocked over. I will have to raid the 2p jar again lol

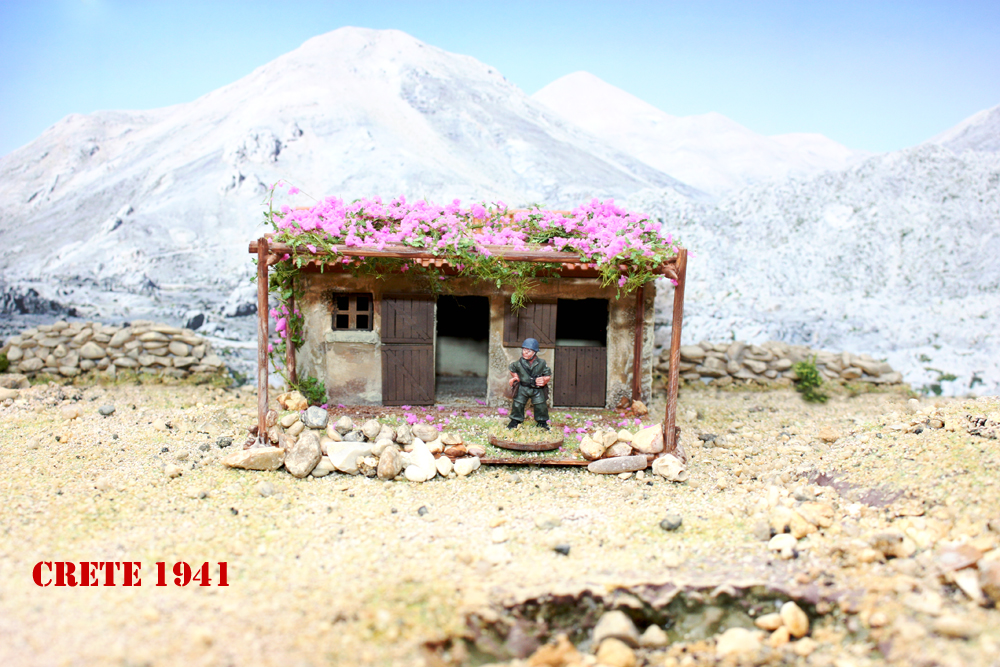
In 1941 German forces invaded the island of Crete in an operation code named, “Mercury”. They used an elite force of Fallschirmjager(parachutists) to invade from the air and the resulting battle would go down in history as a disaster for both the attacking Germans and defending allies.

So you guessed it, I am in the process of painting up a 28mm Fallschirmjager force for operation Mercury and all the other bits needed to complete the project. This will include a mixed force of Allied troops, anti air defence , tanks, Cretan terrain, a Ju52, a DFS 230 glider and loads more.

As mentioned above I am starting off with the German Fallschirmjager force. These guys were elite, veteran troops and highly motivated . The plan to capture Crete was simple, parachute from Ju 52 transport planes or land by DFS glider and capture an airport. Once an airport was captured reinforcement would come from the air as the Germans had air supremacy over the island.

In reality things didn’t go quiet to plan. The Fallschirmjager preferred tactic was to land directly on top of a target(this tactic had brought great success earlier in the war) and use the element of surprise and confusion to over whelm the enemy. Unfortunately German intelligence was particularly poor and would lead to some units dropping directly onto camouflaged Allied forces, resulting in severe German casualties. To further disadvantage the Germans they jumped with minimal personal weapons and on landing they had to find canisters dropped at the same time with most of the larger weapons and spare ammo. Not an ideal situation if you have just landed in an Allied Position !

Luckily the Allies defence of the island was poorly coordinated allowing the groups of spread out Germans to eventually capture the airport at Maleme which enabled them to capture Crete.

The Germans suffered over 6,000 casualties(dead and wounded) on Crete and the Allies lost 1700 and 15,000 were captured. The huge lost of elite German troops and transport planes(350 Luftwaffe planes were lost) were to end the days of parachute drops for the Fallschirmjager as Hitler was not prepared to accept such losses again. The Fallschirmjager would become foot sloggers from that point on.

Anyway that’s the historical narrative covered, now onto the troops and figures I`m going to use. The Fallschirmjager of most WW2 experts conjures up a vision of camouflaged troops armed to the teeth with the best weapons the German war machine could provide, but we are wargaming in 1941 and thus fit into the early war period of the Fallschirmjager.

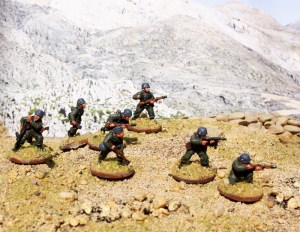
Your typical Fallschirmjager soldier would have been dressed in a green jumpsuit with a blue Luftwaffe colour helmet. Weapons would have been a rifle ,machine gun ,pistol and grenades. Any other weapons were dropped separately in a canister.

The figures I have used are a mixture of manufacturers. I have used 1st Corps, Foundry and Crusader and a few from Warlord Games. The first three manufacturers specialize in early war troops and I have included a few Warlord Games figures(they only provide mid-late war figures) to show the tiny emergence of different uniforms that started to appear in small numbers on Crete.

These are the first 16 completed figures which are a mixture of 1st Corps and Crusader. They go together quite well and its hard to spot the differences unless you pick them up and really closely check. The bases are covered in a new ready made scatter called, “Mediterranean Soil” by geekgaming.

The pictures below are 1st Corps.

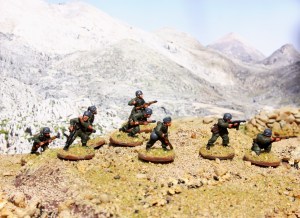
The bottom two pictures are Crusader.

I`m very happy with how they have come out so far and the difference between the two makes

of figures is minimal. I have also started cracking on with the terrain.

More soon.

I have decided to give the Warlord games, “Summer Offensive Painting
Competition” a go under the diorama section. I am going with Bolt
Action and basing the diorama on the picture below. After
that I am taking artistic licence.

Early days so far on my Stug III but lots more to come.

Windmill1

Ok its finally finished.

I ended up going for a simple plasticard base and just

basic vegetation. If the base had been any bigger it would

of limited the amount of places I could of used it on a terrain

board.

So to sum it all up. Due to lack of 15mm windmills on the market

in the Normandy style, I decided to scratch build one. The tower is

made from plastic tube and has modelling clay on the outside giving

the stone effect. The top of the windmill is styrene with modelling clay

on the outside giving the tile effect. I also used balsa wood to make the

sail connection.

The sails are borrowed from another 15mm manufacturer of windmills and I used

an iron rod to connect the sails to windmill. Thus the sails actually turn and

are not fixed in place. The door on the windmill is balsa wood and the windows

are pinched from an “N”guage model railway building.

I tried to go for the overall look of recently abandoned.

Anyway it was lots of fun making it and hope you like it.

Windmill2

Windmill3