15mm WW2 Wargaming Terrain Review
I have been building a lot of terrain as of late and decided to
write a review of what’s available on the market ,specifically
if your wargaming anything to do with Normandy but its still
relevant for most other WW2 wargaming at the 15mm size, particularly
Western Europe.
My review is based on many things including, how detailed the terrain is,
how large the terrain range is, how easy the terrain is to construct, the
uniqueness of the terrain and how customer friendly the company are.
The first 7 reviews are of terrain manufacturers that I have bought,
modified, played and lived with. They are rated after the review out
of a total of 5 points.
Following that are a list of other terrain makers I have yet to
experience but deserve a mention. They are not rated.

Najewitz has a 15mm range that covers Normandy, Italy and Historic. The
Italian range is not available yet but apparently available soon and the Historic
range is limited. Saying that, it’s the Normandy range that is the real jewel in the
crown. There is a Pegasus bridge(for all those who want to play with Horsa gliders),
a fantastic walled farmstead and various sets of houses to make up your Normandy
town or village. The resin buildings come as kits and are unpainted but are
extremely well made and high in detail. An example price would be 45 euros for the
farmstead(which includes a house, a barn, a hay loft, a small shed and a complete surrounding
wall and mini gatehouse for the farm). This sounds pricey but your getting some seriously
good kit. So far I have only found one other manufacturer
of 15mm terrain that produces buildings of this high quality.
Rating : 4.5 out of 5.
2. Loic Neveu.

Yes it’s a French website, but hold your horses. Do not be put off by the French language
and look past the words and have a good look at all that beautiful terrain. Loic Neveu
is an ex French paratrooper who runs the site which is called Decors. All you have to do is send
him and e-mail for a quote and he will work out the costs and get back to you in English, easy !
Onto the models themselves. The 15mm terrain range is huge and is probably the biggest out there
that I know of, strangely not many people are aware of this. WW2 terrain covered includes Normandy,
France ,Germany ,North Africa and Russia.
The quality of the terrain is fantastic and comes with huge amount of detail. Its all unpainted but there
is a great selection from a tiny sandbag gun pit up to the gigantic Normandy church. There is even a range
of civilian cars. One thing I really like is the ability to buy nearly everything in the range as either perfect
or battle damaged.
Rating : 4.9 out of 5.
3. Flames Of War /Battlefront/
Everybody has a piece from the Battlefield In a Box range and to be honest the stuff is quite good. It
comes fully painted and is instantly ready for battle. Its reasonably priced and looks good on the table.
Now the down sides. As mentioned everybody has a piece, so your terrain is not going to stand out
and will look like all those tournament games at your local wargaming show(couple of buildings thrown
on a green bit of felt with a strange floating road). The range is also quite limited and I found difficulty
in getting hold of various bits of stock.
Rating: 3.8 out of 5.
Keer and King have a large range of terrain including French, Dutch, North African,Russian,
and Oriental. Included in this range is a large amount of fortifications and bases. The simple
French building pictured above will cost you £16 plus postage. I have one gripe with the product
and that is its feels and looks a bit block like to me. It is also not as highly detailed as the Goldfinger
and Najewitz terrain.
Rating: 4.1 out of 5.
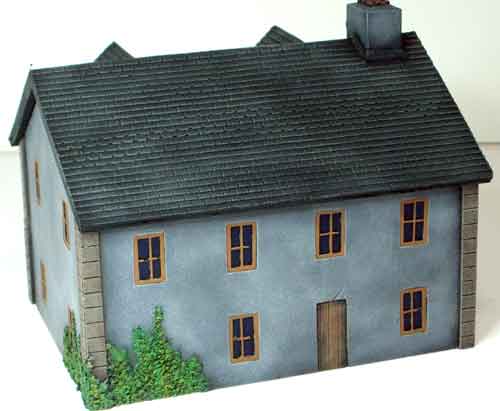
5. Hovels.

Hovels seem to have been around of ages and I think of them as the back bone of model terrain.
If you need a bit of terrain and cannot find it else where,Hovels will have it. Hovels have a huge
15mm range but only a small section is dedicated to WW2. One thing to point out though is that a large
amount of the 15mm ranges carry across to WW2 and will easily sit on a WW2 battle board. A drinking well
from the Napoleonic range or the great barn(see picture above) are timeless and will simply fit in,
which is a great credit to Hovels. Hovels terrain is very well priced and you can buy the
product ready painted if you choose. The Great Barn pictured above will cost you £13 unpainted.
Rating: 4.3 out of 5.

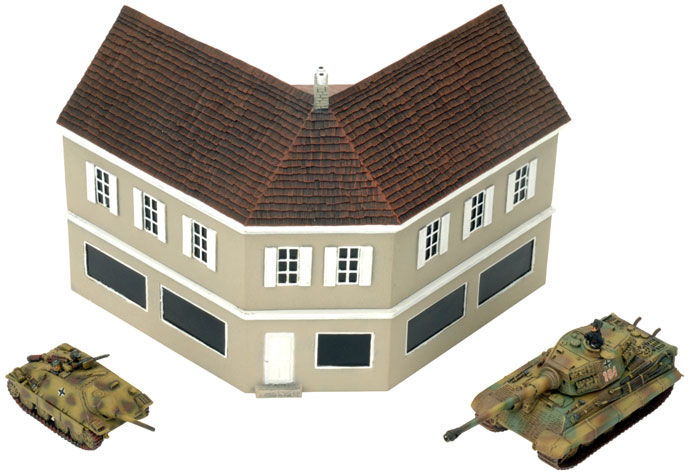
Tiger Terrain as of yet only have a small selection(just covering Normandy) of stuff
but its high quality and the range is growing. I particularly like the Norman church and
the outhouse toilets are excellent. The walled gardens are also a great idea. All models
come unpainted and are resin. The house above on the left would cost you £9 without
the walled garden.
Rating: 4.4 out of 5.
7. Timecast

When the Normandy and Northern France models first came out I thought they were
a bit of a revelation. For me they were the first guys to build terrain specifically aimed
at wargaming Normandy in 15mm. If you want ready made buildings that are painted
then this is most likely the way to go. Now the draw backs. The terrain only comes
ready painted and for me that’s a pain as I like to personalise kit. It also to my eyes and
standing next to other WW2 15mm terrain looks slightly smallish in scale. One other tiny
fault is that I have found that over time the windows(which are stuck on inserts) drop
out. £17.40 will buy the church above.
Rating: 4.2 out of 5.
And now for the rest which are not rated just links and a brief description.
So far as I am aware the only 15mm terrain Crescent Root make is Middle eastern style.
Its made from textured coated MDF and from the pictures it looks stunning.
Lets hope they get into 15mm Normandy terrain shortly as their terrain in 20mm and 28mm
is also fantastic looking.
Gamecraft miniatures specialise in MDF kits. They do a town and country range,
a foam board range(with lots of Middle East stuff), European town and villages
resins kits and modular tile and road systems.
10. The Miniature Building Authority.
They cover a 15mm European range which comes in pre-painted resin.
Specialises in 15mm terrain that would suit any period. There is no WW2 specific section.
12. JR Minis.
Small range of 15mm WW2 terrain.
13. Gelaendestuecke.
Beautifully hand painted WW2 scenery from Germany.
The 15mm range covers Eastern Europe, Western Europe and the Middle East.
On top that they do some very nice road systems suitable for 15mm as well. You can choose
painted or unpainted.
15. Paper Terrain.
Exactly what it says on the tin, terrain made from paper. The main advantage is cost,
you get a lot for building for your money.
Only a small range and its nearly all fortifications.
17. Warbases.
15mm MDF covering WW2.
Its resin and comes painted or unpainted.
19. Epsilon.
Ready to play terrain all painted just for you.
——————————————————————————————
Hope you enjoyed my basic review and please note that I am
aware that not everybody was included. If you would like some
other terrain makers added then just please ask. I am happy to
review anything if its WW2 related and especially Normandy
themed. If any information is incorrect or out of date please
contact me and I will attempt to rectify it.
Please note : The views and ratings stated above are solely my own
and may not reflect the views of the manufacturers.