Posts Tagged ‘Normandy’

🙂Normvil1

Warning, lots of large pictures. Just click on

a picture to enlarge.

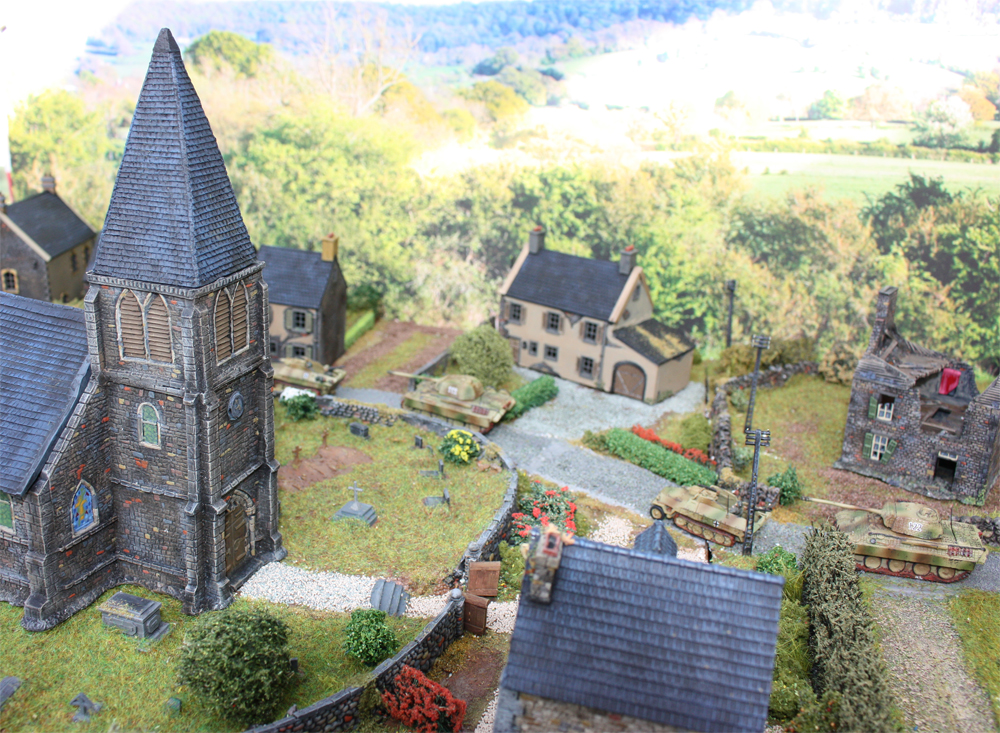
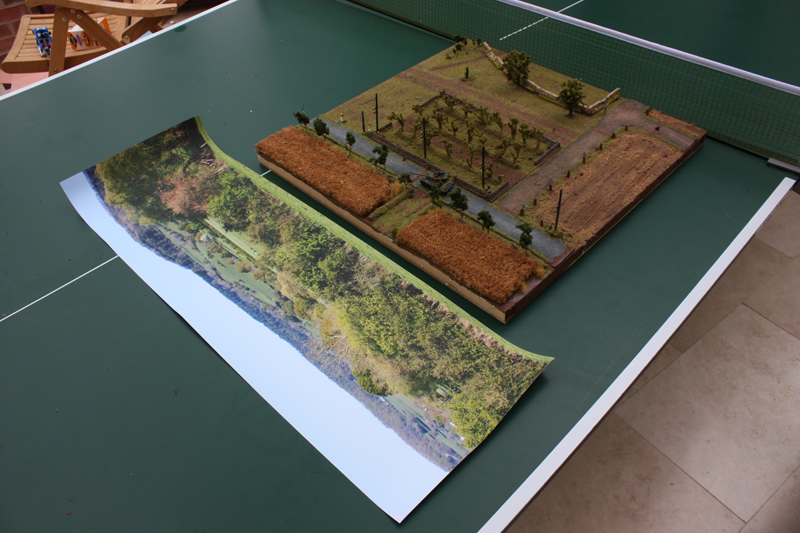
Just wanted to show you how I have been getting

on with my continuing Normandy boards. Still a long way

to go but all 3 boards are coming along nicely. As you

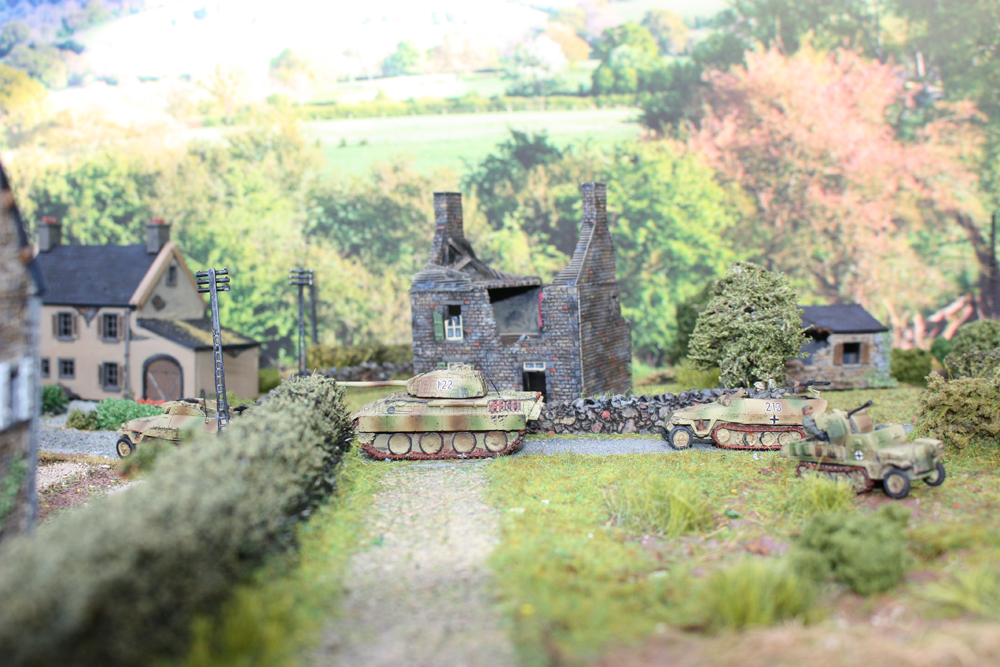
can see from the pictures the 3 additional boards

allow me to crawl out of the Normandy bocage and right

into the local village for a bit of street fighting.

The name of the church and village are fictional so

don’t bother looking for it lol

Normvil2

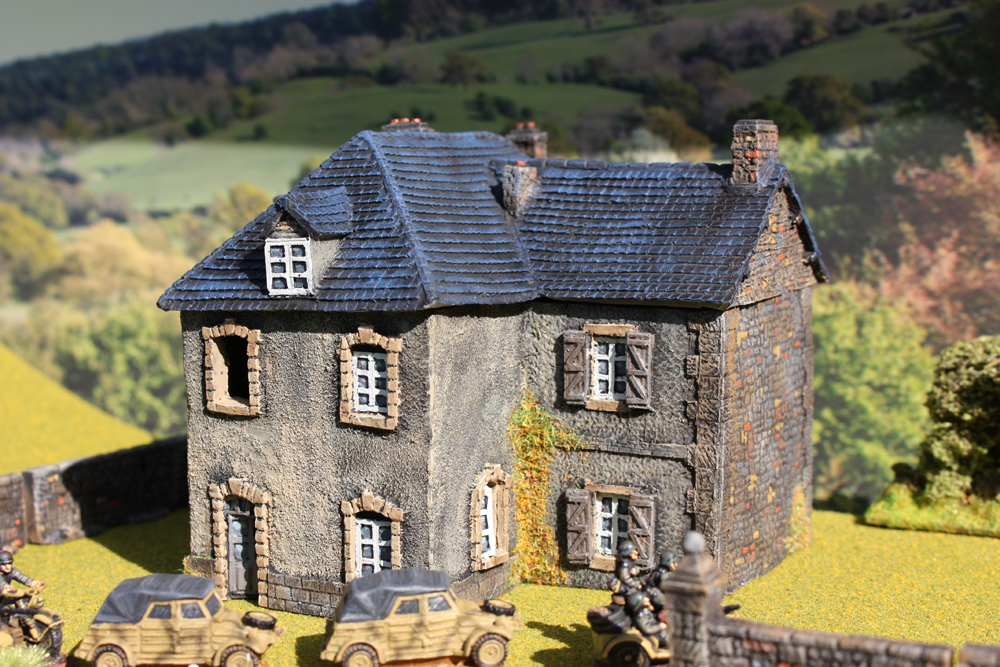
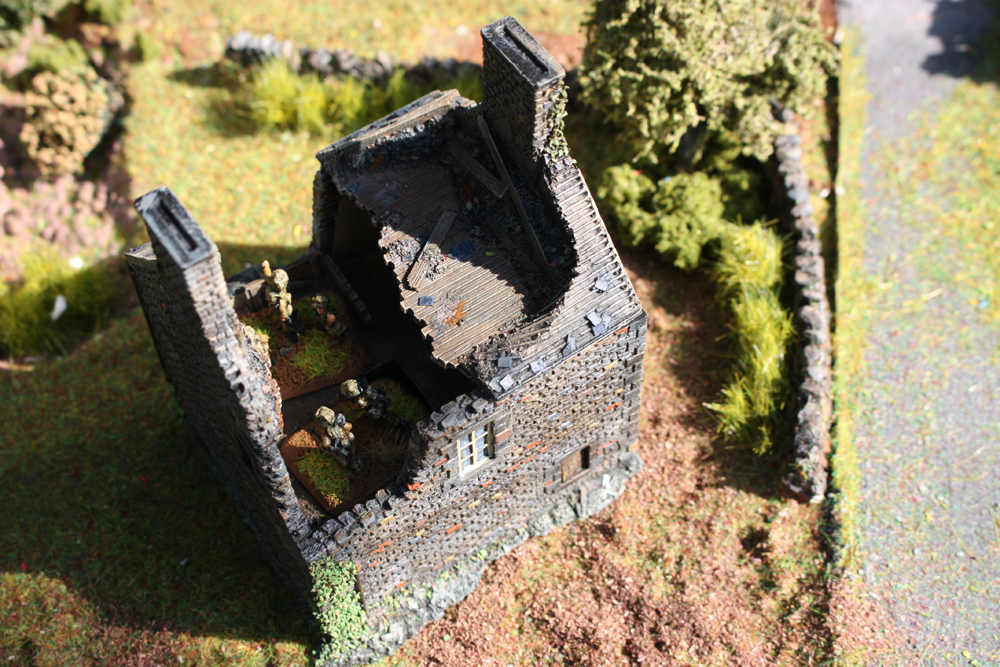
The buildings are all mixed manufacturers and the centre

piece church is a Loic Neveu masterpiece. If you really

need to know who makes any particular building just contact

me for the details.

)Normvil3

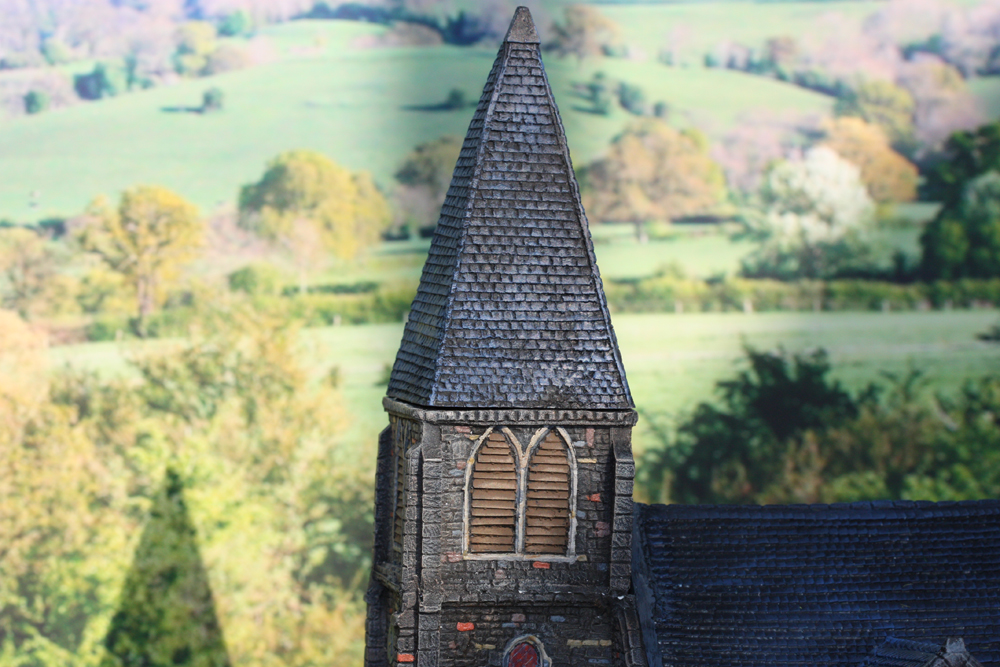
As mentioned in previous posts I have been using Google Maps

to get inspiration and ideas from,especially the church. Most

French villages have a church surrounded by a circular wall and

often sit right in the middle of the village with a road curving

around the church. There is often a war memorial right next to

the church as well.

Normvil15

A few bits of info on the church. The gates to L`eglise Saint Andre

are scratch built and the stained glass windows are a combination of

free hand painting and see through plastic. The roof is removable

so you can fill the church with soldiers to your hearts content.

All buildings on the boards are removable except the walls which are fixed

in position. Also to help with storage the telegraph poles are fixed to the

board with magnets so easily moved.

Lots more to do especially at the more built up end of the village but

light is shining from the end of the tunnel.

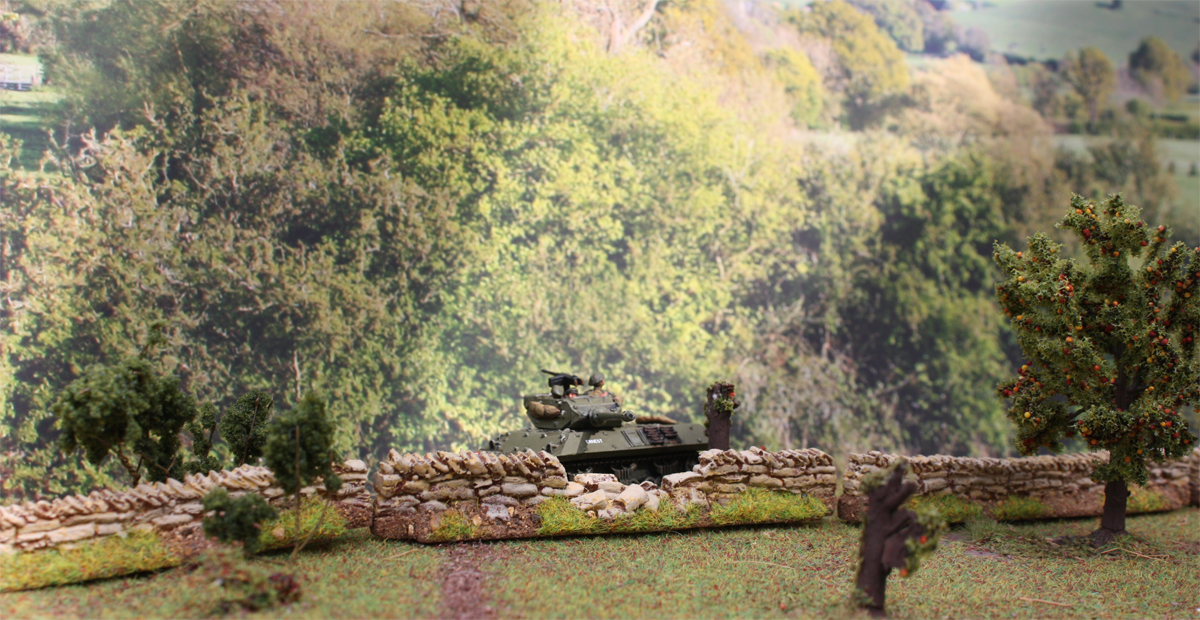
If your wondering that’s a Panzer Lehr Division rolling through 🙂

Normvil4

Normvil5

Normvil6

Normvil7

Normvil8

Normvil9

Normvil10

Normvil11

Normvil12

Normvil13

Normvil14

Normvil17

Normvil18

Normvil19

Normvil21

Normvil22

Normvil26

Normvil32

Normvil27

Normvil36

Couple more buildings finished off. These two are

by Tiger Terrain and will eventually sit in a more

urban location as opposed to the country side they

are presently sitting in. The posters are all pictures

pulled from the net and simply scaled down in size.

Click on any picture to enlarge

Shops1

Shops2

The Tiger is just in the picture because I

like Tigers lol

IMG_9664a

Click on any picture to enlarge

Translated it roughly means farmhouse or some

where the farmer would live. I`m sure some French expert

will correct me lol.

Another Noveu Loic bit of terrain all painted up with

a slight Autumnal feel to it.

IMG_9667a

Enjoy:)

Manor3

Click on an image to enlarge

Another Noveu Loic building and one more building

complete, phew.

Apart from the church(still under construction) this

is the biggest building so far and after painting it all

up I get the impression it just needs a Swastika hanging

from a pole outside and its an instant SS headquarters ?

Perhaps a staff car parked on a gravel drive would be

the finishing touch ?

Straightforward to paint and I added a basic wooden

floor to the inside. Excellent quality building as per

usual and well worth the money.

Manor4

Manor6

Manor2

Manor1

As promised I am posting up my ever growing list

of finished buildings that now grace my wargaming board.

Eventually I should have enough to build a village or

small town.

First up a farm building from Neveu Loic.

Click on an image to enlarge

Norm1

Norm2

Norm3

Second a cow shed from Hovels ,”Papelotte” range.

Norm6

And lastly the “Great barn” also from Hovels.

Norm4

Norm5

That’s it for now but lots more coming shortly. I have

actually finished my Normandy church but you will have

to wait for me to finish its surroundings before you

get to see it. It will be worth the wait.

.Farm house 4

Click on any picture to enlarge

I have already mentioned Tiger Terrain in the 15mm WW2 Terrain review, but

I wanted to go in greater detail and show you what beautiful

buildings they produce and what can be done with them.

The building under the microscope is the ,”damaged farmhouse”

which will set you back £15.30. It comes unpainted and in 4

parts. You can also buy the farmhouse undamaged.

The parts consist of the base with walls of the building, two chimney stacks

and a floor that nicely slots in. There are also some tiny parts

like shutters and windows which allow you to customise the

farmhouse to your choice(a nice little touch).

The resin moulds required no fine sanding and I was unable

to find any flash which was a pleasant surprise. All the parts

fitted together smoothly and I was able to get painting straight

away. Due to the high amount of detail on these models its really

easy to get an excellent finished product and it particularly suited

my method of painting Normandy buildings.

I added a few tiny extra bits of detail to please myself but overall

a fantastic bit of scenery which I think other manufacturers will

find hard to beat.

As you can see there is also loads of room to hide your men inside.

Farm house1

Farm house2

Farm house3

Farm house 5

Farm house6

Give yourself a pat on the back Tiger Terrain.

Normandy Tiger

Normandy Tiger

Normandy Tiger

I have not painted up any German armour for a long while
so on finding a Battlefront Tiger 1 E early still in my
large box of things I have never got round to painting it was game on.
Now the initial impetus came from finally watching the film, “Fury” and
no need to go into the failings of that film. Linked to a recent trip to
Bovington Tank Museum and a new burst of activity on my Normandy terrain
boards it was full steam ahead. Those of you who know your Battlefront
kits will immediately realise I had a problem because the Tiger has rubber
road wheels, no spare tracks and most importantly no zimmerit on it. All
these things are kind of vital for a Normandy Tiger. My first issue was solved
by a few rubber wheeled Tigers still serving in Normandy specifically I went for
tank number 131 belonging to Ustuf Walter Hahn of the Schwer Abteilung 101 .
Next problem was the Zimmerit, so time to experiment with fine household filler
and a sharp knife. In the end is was rather tricky but worked.

NormTig5

The model was airbrushed using Vallejo colours and it took me quite a few coats
to get the effect and colour I wanted. Unfortunately I`m no expert with an airbrush
and I`m sure a lot of people would have completed the job a lot quicker than me.
The spare tank tracks attached to the turret are PSC extras and so is part of the
stowage. The helmets are spare from somewhere ?

NormTig6

Next up being Normandy and the sky being full of Allied planes just itching to bomb
something friendly or not ,some serious camouflage was called for. I have found it
really difficult to get camouflage correct on tanks as 9 times out of ten it just looks
crap. So in my best effort yet I went for the car filter scheme, which has been broken
up into tiny bits and sprayed green and brown . Scatter was then added for effect.
Decals were a problem as I was unable to find any tank numbers in 15mm that are
green with a white outline(colour of the SS 101). I partially solved the issue by
attaching clear decals with white outlines. The green of the tank comes through
the decal, its not perfect but way easier than attempting free hand.

NormTig7

NormTig8

Hope you like it and the scenic backdrops ?

Untitled-1aaaaa

I have been playing around with backdrops for a

while now and I decided to take the plunge and

create one myself. So off I went with my trusty

SLR camera and found some French-ish looking

countryside(to be honest a hedge in England looks

just like a hedge in France) and snapped away.

I then paid a princely sum of £10 and got the

picture put onto Matte card.

The pictures below are the result. Beware they are

quite big photos and if you click on an image it

will enlarge.

Untitled-1aaa

Untitled-1aaaa

Untitled-1aa

IMG_8809a

IMG_8796a

IMG_8791a

IMG_8811a

So how did I get on. To be critical the trees in lower

section are too large and I should of stood back

a bit when taking the photo. The Matte finish seemed

good and I was pleased with the size(300 x900).

Overall it looks fantastic, especially when its behind

your models. I have been to a couple of wargaming shows

this year and as of yet I have seen nothing as good as this

backdrop wise, if anything at all. If you go to a model

railway show they use them to great effect but it seems

wargamers are missing a trick.

Anyway hope you liked them and perhaps it will inspire

a few more people to have a go.

IMG_8519a
I`m done until I build some more boards and yes

I hear you all groaning… not more boards !!!!

No my next project will be some Infinity boards so

rest easy.

Anyway back to the Normandy boards. I have added and finished

two new boards to make a total of six for the playing

area(4 x 6). The latest two have a nice river obstacle with

hump back bridge. They also contain a fixed defensive trench

line and artillery battery area. The artillery battery area and trench

line are camouflaged to stop the allied Typhoons rocketing the

hell out of place.

Please note you can click on all pictures to enlarge

and some of the pictures are quite big.

IMG_8524a

I have added a full Panzer Lehr Division and the British 11th

Armoured Division to the board so you can see how it all feels

to play with.

Arty preparing to fire.

IMG_8529a

Target spotted.

IMG_8530a

View from above.

IMG_8532a

Look out the boss is watching.

IMG_8535a

Life in the trenches.

IMG_8537a

Ok whos walked mud into the trench ?

IMG_8538a

British forces prepare to enter the bocage.

IMG_8555a

Panthers trying to deploy in bocage.

IMG_8564a

Panzer Grenadiers moving up to join the action.

IMG_8570a

German infantry moving up.

IMG_8573a

Panthers stuck in a sunken lane.

IMG_8584a

MKIV in ambush position.

IMG_8594a

Moaning minnies at home in the thick hedgerows.

IMG_8595a

Halftrack traffic jam plus a bit of anti air.

IMG_8598a

Anybody bring any hedge cutters ?

IMG_8604a

Hold on, hump back bridge.

IMG_8606a

Lost Panzer IV.

Untitleda-1

JagderPanzer IV`s defending the left flank.

Untitledb-1

Thankfully the sun came out and allowed me to take the

photos above.

I will post up a battle report soon to see how bocage fighting

pans out 🙂

Typhoon2

Just click on an image to enlarge :

Its a Revel Micro Wings Hawker Typhoon 1B

which comes as an unpainted 1:144 scale kit at

tiny cost of £2.99. The reason I went for this kit

is simply the price. The equivalent plane from

Battlefront is £11.50 plus P & P so I`m onto a winner

straight away.

Now apart from a few plane kits when I was about 10 yrs

old this was all new to me. For a start the kit is

absolutely tiny so unless you have the fingers of a church

mouse your going to have problems. Some of the parts are so

small I needed tweezers to hold them. On top of the that the

kit is not the best quality in the world but for £2.99 I`m

not moaning. I followed the Flames of War rough paint guide

which used Vallejo colours and did all the stripes by free

hand which you probably guessed by the not so straight lines.

Overall I produced a basic table top paint job. Three things that

bugged me about this kit were the rockets under the wings which

were just bad quality model kit, the cockpit which fails to have

enough model detail and the decals. The decals were intended to

go over a non D-Day black and white striped plane so don’t look

correct.

Typhoon1

IMG_8483a

The photo below is the same as the black and white photo and

without the stand being edited out.

IMG_8447a

Finally I think a taller stand is needed ?

Anyway I`m off to straff some unprepared German armour 🙂