Archive for the ‘Painting’ Category

To quote AR Turner,”Not just light at the end of the tunnel,

but glorious chaotic light

I know its not everything finished but its a start 🙂

Please click on images for a bigger picture.

IMG_6457a

IMG_6456a

IMG_6458a

IMG_6459a

IMG_6460a

IMG_6461a

IMG_6462a

IMG_6463a

IMG_6464a

IMG_6465a

IMG_6466a

IMG_6468a

Now that my painters block has been removed(excuses, excuses)

I should be able to finish the rest.

Yes its taking an age, but that old problem beer keeps

getting in the way 🙂

Slow progress but there is light finally at the end of the tunnel.

Bases yet to do, chevrons and fine detail.

IMG_6384a

IMG_6386a

IMG_6392a

IMG_6394a

IMG_6396a

IMG_6398a

IMG_6402a

IMG_6411a

The rhino is still without paint but now with plough and hounds.

IMG_6408a

Still have not started my Warsmith but I do have a chosen

model for conversion(top secret) and the candidates who failed

for the job are going to be Command/HQ extras.

Cant remember his name and he`s got a broken sword

so he volunteered to be a statue. The bottom of the

mount is a 1/72 scale tank base and a wooden printing

block above it. The best bit for me was the creeping vine

which is horse hair(got a riding stables next door to me and

its all over the road),microwaved to kill anything unwanted and

dyed in wash and paint. Add some pva glue and on with the scatter

by Tremendus.

IMG_6410a

In the picture he is sitting on a red Martian looking

background and as of yet is still to get some red

weathering to blend in.

In think he needs to go outside a temple or city complex ?

As I was building in the shed I went all out and

had a go at Teddy Bear fur fields.

Once again trusty ebay did the job and up

turned a bag of hair. After reading online I

found an old pair of clippers and lowered the height

of the fur which must start at about at least 2 inches

or more. Anyway either the clippers were blunt or who

knows what, but it was useless. Plan B came into force

and out came the trustee scissors which worked a treat.

I cut a lowered section of fur through the middle so it looked

like a natural path.

Now for the colour. The fur comes as a natural creamy/

brown which is great as grass is usually that colour

towards the bottom, away from sunlight. I borrowed the

kids hogs hair brush(big fat thing) and dry brushed

acrylic paint into the fur, trying to only paint the

top third of the fur. I basically started with a dark

green and got steadily lighter.

1st shot after 1st lot of paint:

IMG_6275b

2nd shot, more paint:

IMG_6286b

3rd shot surrounded by bocage:

IMG_6370b

I think it worked out well and once surrounded by

additional terrain such as walls and hedges it will

look even better.

Deep in the depths of my shed I have been experimenting

with the bocage and have finally got a winner, perhaps ?

Step One:

Polystyrene was used for the banking(light and dirt cheap)

and cut to shape, then pva glued. I based one on 3mm mdf

and didn’t bother with the other. The cocktail sticks

are just to hold it together while gluing.

IMG_6250a

Step Two:

Add some twigs from the garden as tree trunks and glue

into place.

IMG_6252a

Step Three:

I used standard house hold filler to smooth off the bank

and any sharp edges. I then cover everything in pva glue

and added a mix of sand and stone for texture. Let dry.

IMG_6257a

Step Four:

Paint brown with house hold paint.

IMG_6260a

Step Five:

More pva glue over all and add your flock/scatter mix.

I tried all green at 1st but found the brown gave it a

better look.

IMG_6263a

Step Six:

Grab your self some rubberised horse hair(ebay was cheap)

and separate it out into thin bits. It comes as a thick

section and reminds me of horse jumping hedges. Now with

your pva glue again thread between your twig trees and glue

down. I found you had to put weights on the horse hair while

gluing as it springs up otherwise. I added a bit of moss as

well.

IMG_6270a

Step Seven:

Using a spray bottle(50/50 pva glue and water) spray the

horse hair with your glue mix. Now sprinkle on your scatter

so it looks like leaves. Leave it dry over night.

IMG_6287a

This is what it looks like next to a field and with a tank in:

Click on the image to get a bigger version 🙂

IMG_6354a

I tried two other methods of making bocage from moss but

was not happy with the outcome.

Also the bocage next to field is not 100% finished and

needs a bit of airbrushing here and there.

What do you think ?

Just finished by Battlefront plastic Jagdpanther and I`m very

pleased with it. The cheaper plastic kit(there is a metal version) is

just as good and comes with a ruined building(not shown). Once again I

really could not be bothered getting the airbrush out for a couple of

minutes use and then spending an hour cleaning it so free hand time

with the camouflage.

Please click on pictures for larger size.

IMG_6173a

IMG_6172a

IMG_6173a

IMG_6174a

IMG_6175a

IMG_6176a

IMG_6179a

IMG_6180a

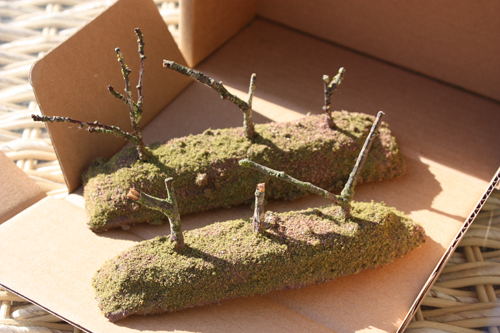
The interesting part about this small project for me was the bocage

itself. I knew what bocage was and have been all over Normandy and seen

the stuff first hand. What was compelling was the constant argument on

various forums about should bocage have stone at the bottom of it ? Well

the first hand and most accurate answer is yes and no. Some bocage is built

up on age old(Middle ages or later) walls and some is not. Quite often stone is

used on hill sections of bocage and deep cuttings. Farmers in general clear fields

and push stone to the side and leave it. It is then overgrown by weeds and becomes

part of the bank/hedge.

The second compelling bit of information I came across after reading up on the

subject was the way enemy tanks were killed in the bocage. First initial thought

was great big dirty tank destroyer behind a hedge kills all(the Jagdpanther for example),

but you couldn’t be more wrong.

In bocage country 54% of tank kills were caused by gunfire(tank,anti tank,td and arty),

20% by mines,13% by non combat(stuck in mud or mechanical failure),7% by Panzerfaust

and the remaining 6% by miscellaneous.

If we then look at the 54% in more detail ,Britsh and American studies show that half

of theses kills were attributed to Stugs and by direct frontal penetration at an

average 800 yards. Forget the Jagdpanthers,Panzer I`Vs,PAK 43 man handled and arty the Stug

was the main man in the bocage!

Anyway I`m building a Normandy board as we speak to look out for hand crafted bocage with

and without stones and a few lurking Stugs.

I need to get my lava painting skills up to scratch and was

wondering how everybody else paints lava ?

These two are examples I have experimented on. Please note the Terminator

was not painted by me. I only made and painted the base on the Terminator.

I used plasticard to built up the bases. Black base coat and Dawnstone dry brush

for the rocks. The lava was basically Dark red through to orange and a tiny white

line through the middle.

IMG_6099a

IMG_6100a

IMG_6101a