Archive for the ‘Battlefront’ Category

Deep in the depths of my shed I have been experimenting

with the bocage and have finally got a winner, perhaps ?

Step One:

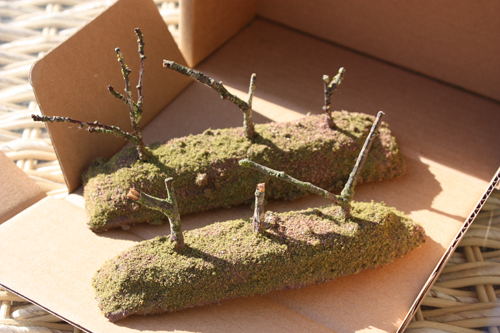
Polystyrene was used for the banking(light and dirt cheap)

and cut to shape, then pva glued. I based one on 3mm mdf

and didn’t bother with the other. The cocktail sticks

are just to hold it together while gluing.

IMG_6250a

Step Two:

Add some twigs from the garden as tree trunks and glue

into place.

IMG_6252a

Step Three:

I used standard house hold filler to smooth off the bank

and any sharp edges. I then cover everything in pva glue

and added a mix of sand and stone for texture. Let dry.

IMG_6257a

Step Four:

Paint brown with house hold paint.

IMG_6260a

Step Five:

More pva glue over all and add your flock/scatter mix.

I tried all green at 1st but found the brown gave it a

better look.

IMG_6263a

Step Six:

Grab your self some rubberised horse hair(ebay was cheap)

and separate it out into thin bits. It comes as a thick

section and reminds me of horse jumping hedges. Now with

your pva glue again thread between your twig trees and glue

down. I found you had to put weights on the horse hair while

gluing as it springs up otherwise. I added a bit of moss as

well.

IMG_6270a

Step Seven:

Using a spray bottle(50/50 pva glue and water) spray the

horse hair with your glue mix. Now sprinkle on your scatter

so it looks like leaves. Leave it dry over night.

IMG_6287a

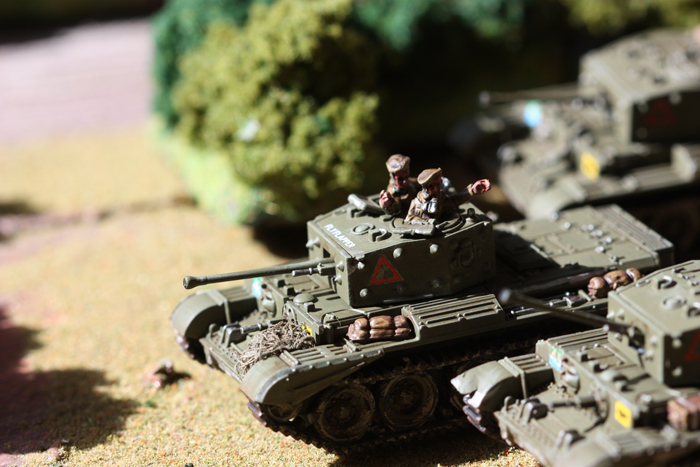
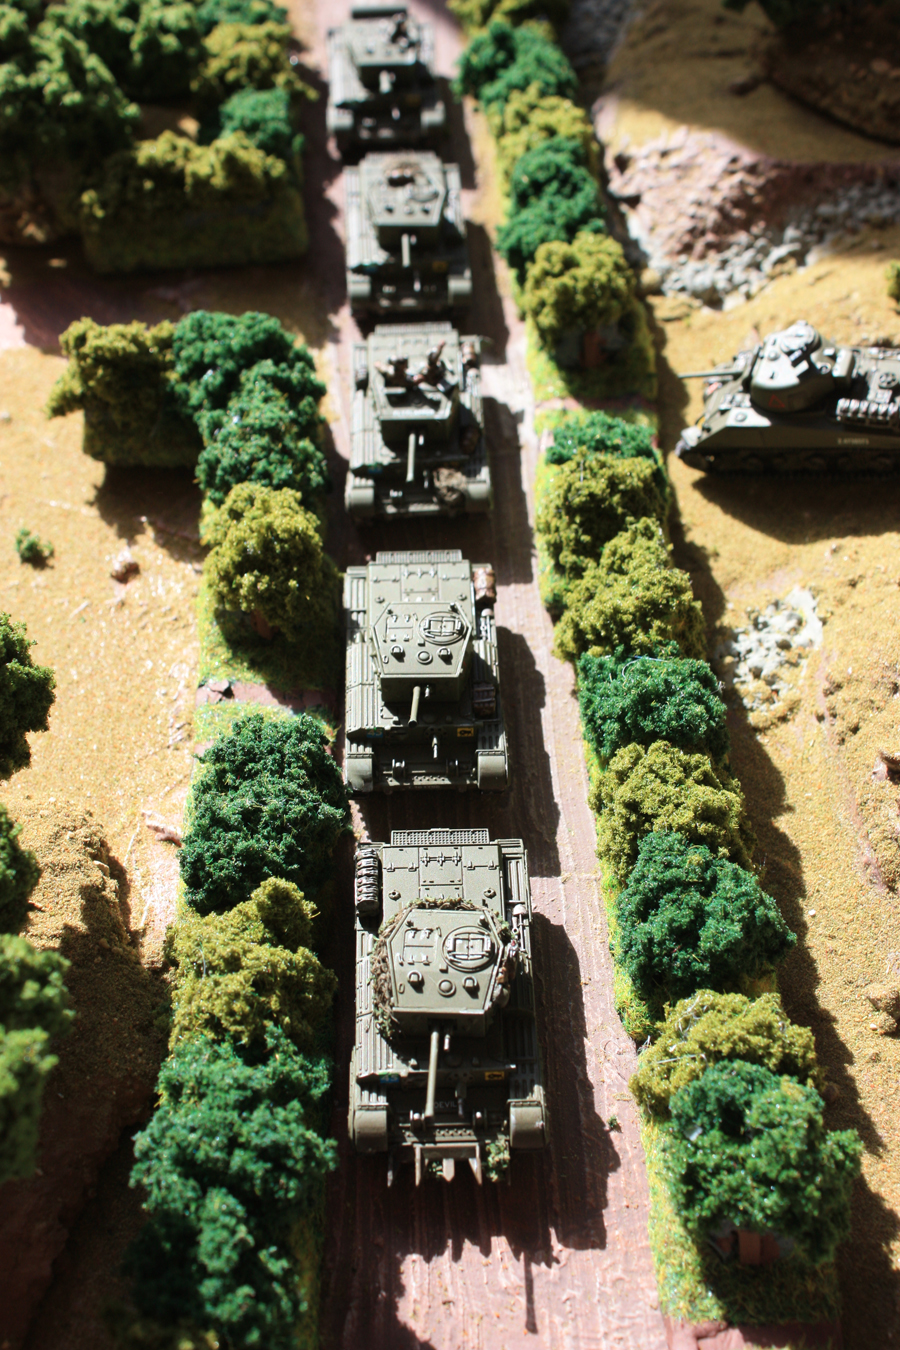
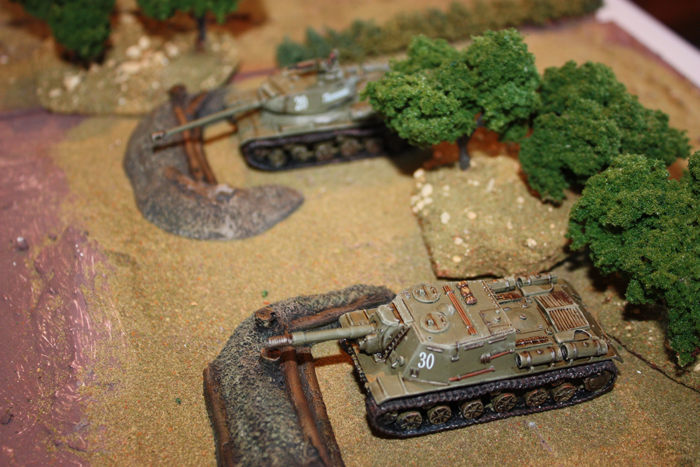
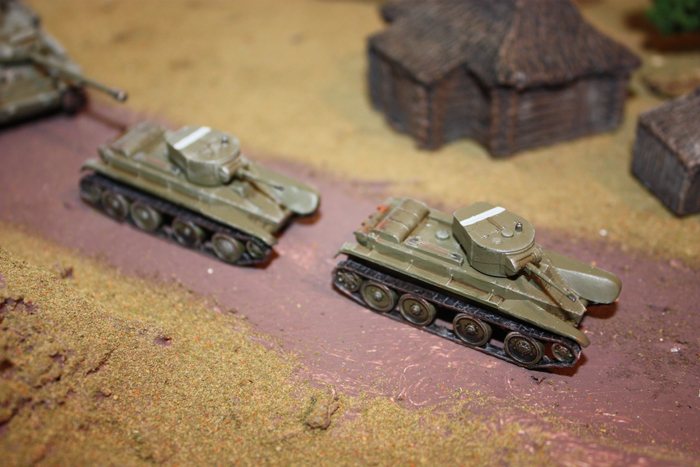
This is what it looks like next to a field and with a tank in:

Click on the image to get a bigger version 🙂

IMG_6354a

I tried two other methods of making bocage from moss but

was not happy with the outcome.

Also the bocage next to field is not 100% finished and

needs a bit of airbrushing here and there.

What do you think ?

More 15mm tanks from Plastic Soldier Company,but this time with

single tracks :).The PSC box comes with 5 Cromwells and plenty

of choice to make each vehicle different. I have added some different

crew and stowage made from cheese cloth again. Some of the cheese cloth

has scatter stuck on to make it appear like foliage. One small

criticism of the PSC model is that the front glacial(location of

45 and Black Bull) plate of the Cromwell is very narrow making it

hard as hell to fit a decal on.

My Cromwells belong to 11th Armoured Division but are 2nd Northamptonshire

Yeomanry as they provided Recce along with 15/19th Kings Royal

Hussars.

Click images below for larger picture.

Enjoy 🙂
IMG_6297a

IMG_6318a

IMG_6323a

IMG_6324a

IMG_6331a

IMG_6332a

IMG_6334a

IMG_6335a

IMG_6336a

IMG_6339a

IMG_6340a

IMG_6341a

IMG_6349a

Decided to make my Jagdpanther blend in a bit more

with a bit of camo. Take a few bits of electrical wire

and twist them together to make the branches. Next paint

them brown(couple of coats will be needed) and they stick on

your flock with pva glue. I painted lighter colours(yellows and

browns) onto the flock before sticking it on. I then got me a bit

of cheese cloth and dipped it in a mixer of Agrax wash and green

paint and then dried it in the conservatory for a camo net. Now

just stick your camo net onto your vehicle and thread through the

branches.

Click on picture for bigger size.

IMG_6185a

I have left this camo net hang loose but you can apply it slightly

damp and mold it to the vehicle shape.

Just finished by Battlefront plastic Jagdpanther and I`m very

pleased with it. The cheaper plastic kit(there is a metal version) is

just as good and comes with a ruined building(not shown). Once again I

really could not be bothered getting the airbrush out for a couple of

minutes use and then spending an hour cleaning it so free hand time

with the camouflage.

Please click on pictures for larger size.

IMG_6173a

IMG_6172a

IMG_6173a

IMG_6174a

IMG_6175a

IMG_6176a

IMG_6179a

IMG_6180a

The interesting part about this small project for me was the bocage

itself. I knew what bocage was and have been all over Normandy and seen

the stuff first hand. What was compelling was the constant argument on

various forums about should bocage have stone at the bottom of it ? Well

the first hand and most accurate answer is yes and no. Some bocage is built

up on age old(Middle ages or later) walls and some is not. Quite often stone is

used on hill sections of bocage and deep cuttings. Farmers in general clear fields

and push stone to the side and leave it. It is then overgrown by weeds and becomes

part of the bank/hedge.

The second compelling bit of information I came across after reading up on the

subject was the way enemy tanks were killed in the bocage. First initial thought

was great big dirty tank destroyer behind a hedge kills all(the Jagdpanther for example),

but you couldn’t be more wrong.

In bocage country 54% of tank kills were caused by gunfire(tank,anti tank,td and arty),

20% by mines,13% by non combat(stuck in mud or mechanical failure),7% by Panzerfaust

and the remaining 6% by miscellaneous.

If we then look at the 54% in more detail ,Britsh and American studies show that half

of theses kills were attributed to Stugs and by direct frontal penetration at an

average 800 yards. Forget the Jagdpanthers,Panzer I`Vs,PAK 43 man handled and arty the Stug

was the main man in the bocage!

Anyway I`m building a Normandy board as we speak to look out for hand crafted bocage with

and without stones and a few lurking Stugs.

I have been adding to my Russian armour as of late

with these two heavy beauties from Battlefront and

a couple of light weights from Zvezda.

What strikes me about the IS2 and ISU 152 is

their shear size, its intimidating. Saying that

having an IS2 and a ISU 152 hiding in some woods

as back up brings a smile to my face and worries the

hell out of the opposition.

I added the two BT5`s as an after thought and intend

to use them as spotters(cannon fodder).
IMG_5930

IMG_5931

IMG_5934

IMG_5932

IMG_5938

IMG_5935

IMG_5937

More object markers and scenery for 15mm

wargaming.

fuel2

Fuel1

Both by Battlefront.

Just in case my wave of T-26`s comes unstuck I have

added an Su-76 to cover the retreat.

This little model by Battlefront was a joy to make and

paint due to high detail found on metal models. I also find

it much easier to achieve better detail when only painting

one model as opposed to a mass batch.

Enjoy:

IMG_5663

IMG_5665

IMG_5666

IMG_5667

I`m now tempted to build something big enough to

stop a Tiger 🙂

Fireflys

Posted: January 8, 2014 in 15mm, Battlefront, British, Flames Of War, WW2
Tags: , ,

With all those Panthers lurking in the hedge rows

it was time to even things up. Bring on the 17pdr`s.

These have a bit more markings, specifically they

are 11th Armoured Division, 23rd Hussars Regiment.

IMG_5642

IMG_5643

IMG_5646

IMG_5647

IMG_5649

I am quite pleased with the darker shade of green

as I was worried it would come out like Soviet

green.

Panthers

Posted: January 8, 2014 in 15mm, Battlefront, Flames Of War, WW2
Tags: , ,

Back to WW2 German tanks and this time its Panthers.

I have left off any distinguishing marks so I can use

them from 1943-45.

The paint scheme was a lot better than the Tiger.

IMG_5621

IMG_5628

IMG_5633

IMG_5635

IMG_5638

IMG_5639

IMG_5641

Hardest part of these Panthers was the decals. I have small

fingers and its still murder trying to put them on.

Its finished, but I`m not happy with it.

Quite a few mistakes in construction and I don’t like the paint job. Oh the photos are`nt much good either.

IMG_5369

IMG_5370

IMG_5372

On the plus side it was all a learning curve so the mark II will be better.