Archive for the ‘Flames Of War’ Category

I seem to have slowed down as Christmas is crept up

and concentrated on the small bits of detail needed to

bring the battlefield to life.

More walls(you can never have enough walls), a water trough

and pump by Hovels, a well from Hovels, a barn from a cannot

honestly remember(I buy things and they sit in boxes for ages

and then I remember them but for the love of.. I cant think

where I bought them from !) and some crafty animal water troughs/

feeders which have come from a new spring of battlefield goodies

I discovered recently. The spring of goodies is the world of miniature

dolls houses and farm equipment and its huge and full of 15mm/20mm size

objects 🙂

Anyway I bought a couple of cow looking troughs and stuck them to

side of the building and a wall and filled them with Scenic realistic

water(I tried E-Z water 1st but was not happy with the result). Add on

some foliage and Bobs your uncle. I also scratch built a tap on the side

of the barn to feed the trough.

None of its actually finished yet but nearly there.

IMG_8107

IMG_8111

IMG_8113

IMG_8119

Finally just got to say to everybody, “Have a wonderful

Christams and I hope Santa brings everything you want“. Failing

that do what I do every year,put your own presents under the

tree lol

menu-logo

Its just been released today specifically for people playing Flames Of War.
Basically its an online army generator saving you the time and effort to
work out what you can and cannot field on the table.

Here is the official line :

Forces Of War gives you the ability to prepare and refine army lists effortlessly.
This website is an automated tool which lets you trial endless combinations of platoons
and options from Flames Of War Intelligence Briefings until you find the ideal design
for any points level or model collection. Not only does it allow you to build the perfect army list,
but also print it out in an attractive, easy-to-read format, including the appropriate
Arsenal data and Special Rules for your force
.

Beware there is a cost involved but its a lot cheaper than buying all the books.
Rough costs work out at $16 an online briefing compared to a $50 book.
You can also have smaller briefings at a $1 a go. Its also only in ipad format so far, I think ?

Follow the link below : http://forces.flamesofwar.com/index.aspx

A big plus for this as I see it is that its much easier to have a tablet on your
gaming board with all the rules, lists and info than half a dozen large books.
The storage factor is also a large plus as I have shelves of books going dusty.

I will be giving it a go later and will report back.

As the end of the Year is just round the corner I

decided to go for a group shot of my growing British

forces which are being assembled to take on my Panzer

Lehr sledgehammer.

Just click on a picture to enlarge. Be aware these

pictures are quite big 🙂

Everything1-1

Everything2-1

Everything3-1

Plenty more room on the table so best get painting.

I think some aerial power is required ?

Everybody needs something to stop the Panzers in

their tracks and these babies could do just that.

17pdr guns that had better performance than the

German 75-mm (long) or 88-mm counterparts.

All four are made by Battlefront and I have chopped

and changed the crews to make them as British looking

as possible. Out with helmets and in with the berets and

pipes. The vehicles have 75th Anti-Tank Regiment markings

which once gain fits nicely into the 11th Armoured Division

tree.

Click on an image to enlarge 🙂

IMG_8053x

IMG_8058x

IMG_8062x

IMG_8064x

IMG_8070x

IMG_8074x

Continuing with my British forces I decided to add

some much needed recon starting with an Armoured

Car Platoon. I have started with 3 Daimler Dingos

by Battlefront,2 Daimler Mk1 Armoured Cars by

Battlefront and a beefy Staghound by Skytrex. I

already have a Carrier Platoon so I can mix and

match as required in the reconnaissance role.

All the vehicles and markings still fit into the

11th Armoured umbrella with the “44” being the

Inns Of Court Regiment

I have added some extra stowage and changed a

few of the crew. I also added aerials which are

essential for a recon vehicle to report back what

it can see.

Click on any image to enlarge 🙂

IMG_8083x

IMG_8084x

IMG_8081x

IMG_8088x

IMG_8089x

IMG_8075x

IMG_8078x

Untitledx-2

Untitledxx-1

Sorry if you thought I was done but I needed

another two boards. Specifically I wanted a

river/stream, a bridge, trenches and just a bit

more bocage.

To save time I borrowed two old flat terrain

boards from the shed and started converting

them. I have made and painted the bridge and

found a pillbox going spare which will look

right at home hidden in undergrowth.

Click on a picture to enlarge :

IMG_7935a

The two boards look a bit rough but bare with

me because as mentioned they have been re-used.

The first board sits on the left and contains the

trench system I am currently building out of balsa

wood. Its raised ground so will be able to cover

and arty spot all six boards eventually. It will

also be buried under bocage and have a stream

running above it as marked by the stick.

IMG_7939a

The trench will go under ground at the right hand

side of the board and reappear on the next board.

This way the join marks are nicely concealed 🙂

The board on the right has two artillery emplacements

either side of a road with the stream running in front

of it with a bridge.

The trench system comes in from the left side.

Boardaa-1

Sorry if the pictures are hard to understand,

but all will become clearer shortly.

IMG_7843a

First time I have done a tutorial so go easy on

me 🙂 This is an simple tutorial on how to

assemble the Najewitz Modellbau Normandy

farmstead,add a few extras and paint it all up.

Just got to mention before I start that my

inspiration for this was a thread by somebody

called “raphaeloudsen” on DakkaDakka

who for reasons unknown is un-contactable and thus

I was never able to ask him how he did his masterful

work which was a lot better than mine.

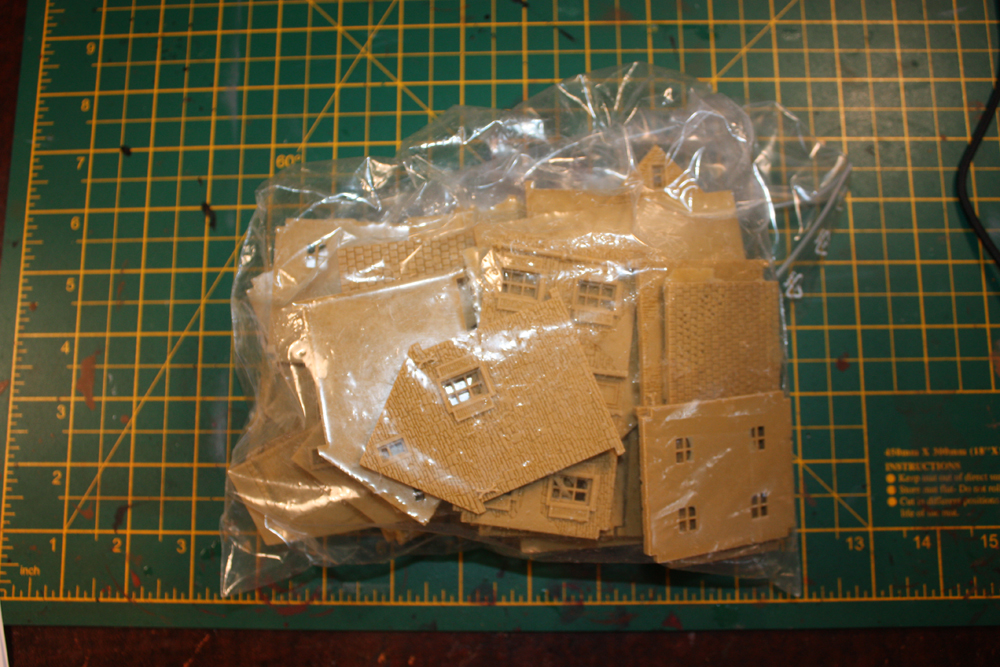
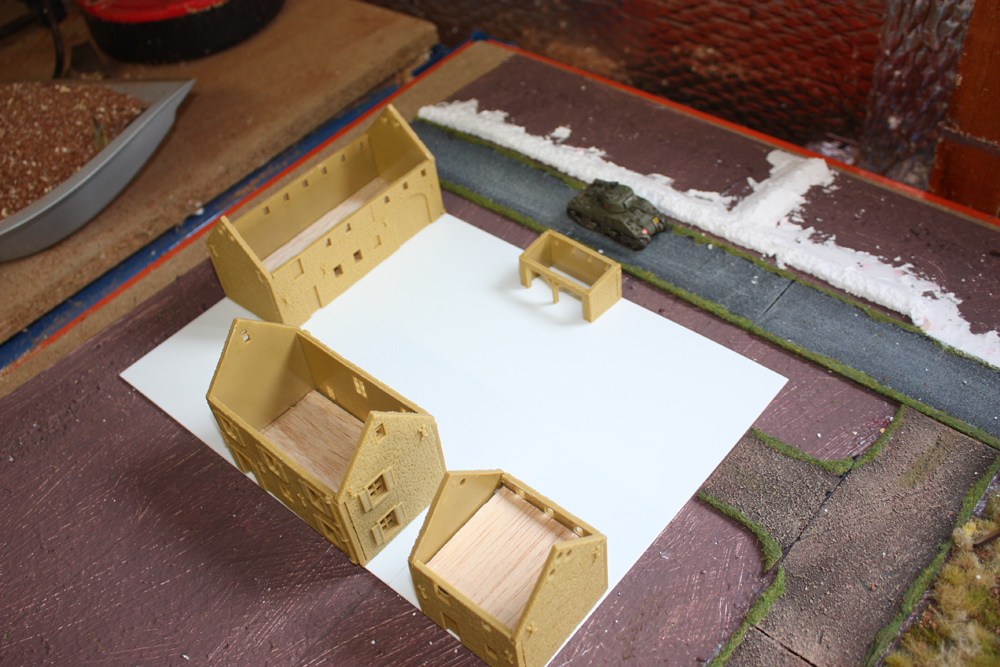
For 45 euros you get a house, a barn , a sort of a hay

loft, an out building , a large gate with roof and a

large section of walls. You basically get a bag of bits

that look like this.

Click on a picture to enlarge it.

IMG_7861a

Step 1: As with all resin kits it has small amounts of

flash on it that will need to be removed either with a

sharp craft knife or small file. Once its all removed I

washed all the bits in warm water to ensure it was clean

for assembly.

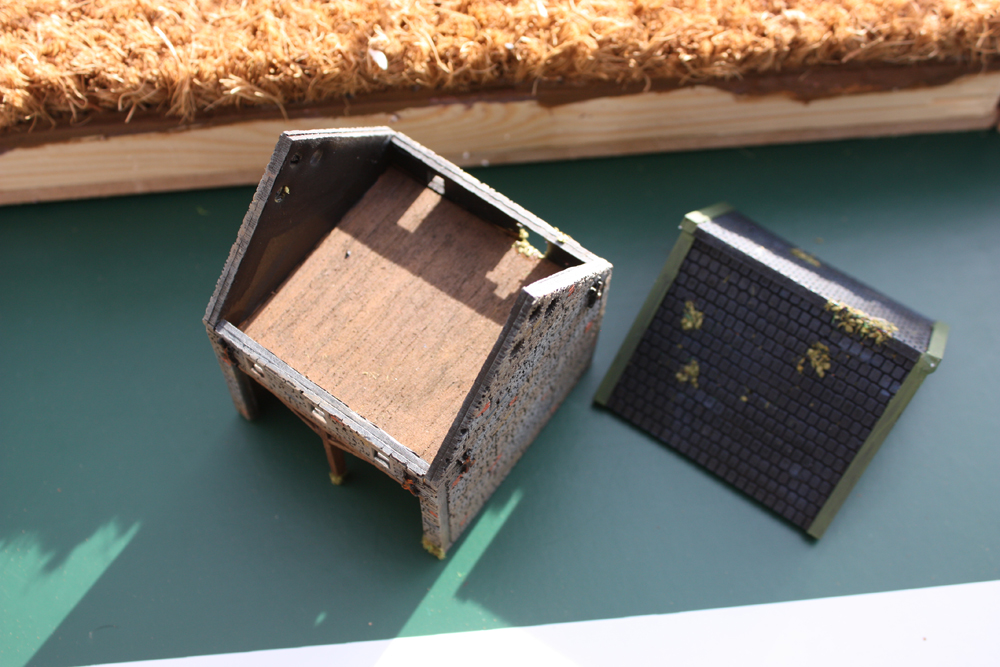
Step 2 : Before gluing I cut out floors(made from balsa)

to go inside the buildings. This way you can have two

floors for figures inside the buildings.

IMG_7854a

Step 3 : I now glued the buildings together using small

G type clamps. When the glue was dry I glued in supports

for balsa wood floors. I used a mixture of balsa and

plasticard(its hidden so nobody will see). Once dry

glue in your floors(leave top floor un-glued). Fill

any gaps in the buildings with green stuff.

IMG_7406a

Step 4 : I wanted the farm not to be fixed to my

terrain board for storage and so that it could be

moved around. To solve this I decided to fix the

entire farm to a plasticard sheet. The idea was to

fix the walls and gates permanently but leave the

buildings free. I used a standard 29.5cm x 20.5 cm

white plasticard sheet and about 3cm depth. Before

any painting I marked out where my buildings were

going to go on the plasticard and especially

important how the walls would all connect. One

small problem I noticed was that the gate is too

small for a tank so I left an opening in the wall

system for tank access. At this point you should

have glued all your walls together(they come in two

parts) and cut them to size to fit the base.

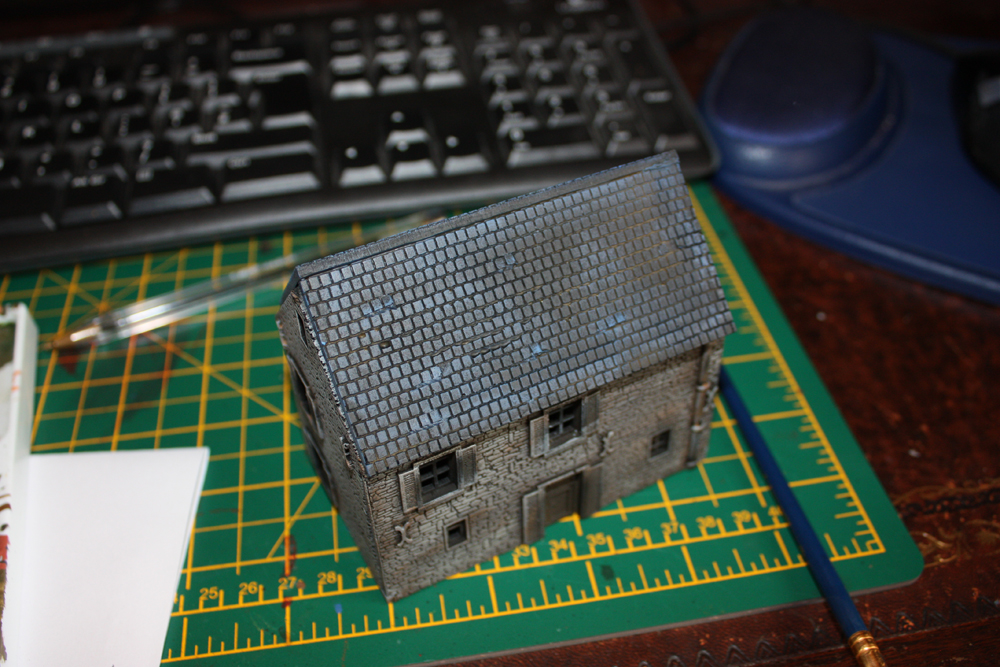
Step 5 : Painting. I used a mixture of GW , Vallejo and

P3 paints but anything will do. The colours of Normandy

buildings vary so don’t get the idea that my colour scheme

is the only one you can do.

The list below is just for walls, not the roof, windows

and doors. I tried not dry brush over the same areas thus

giving different colours across the brick work.

1. I base coated all the buildings and walls GW Chaos black.
2. I dry brushed everything Vallejo Flat Earth.
3. I dry brushed everything GW Dawnstone.
4. I dry brushed everything Vallejo Stone Grey 884.
5. I dry brushed everything P3 Troll blood in wavy lines.
6. I dry brushed everything GW Steel Legion in wavy lines.
7. The next painting stage consists of picking out bricks. Basically
paint a couple of bricks here and there is a random method. So first
up I used Vallejo Red Leather.
8. GW Tallarn Sand brick picking.
9. GW Mechanicus Standard Grey brick picking.
10. GW Gothor Brown brick picking.
11. GW Agrax Earthshade wash over all the brickwork.

IMG_7525a

Doors: Wooden doors and shutters were painted GW Loren Forest.
Window Frames : GW Bleached Bone.
Window and Doors Sills : GW Baneblade Brown.
Drain Pipes : P3 Traitor Green.
Other Doors : Vallejo Flat Brown.
Doors, shutters & sills GW Agrax wash.

IMG_7580a

Roof: GW Aldorf Blue dry brush.
Roof: GW Agrax Earth shade wash.

IMG_7515a

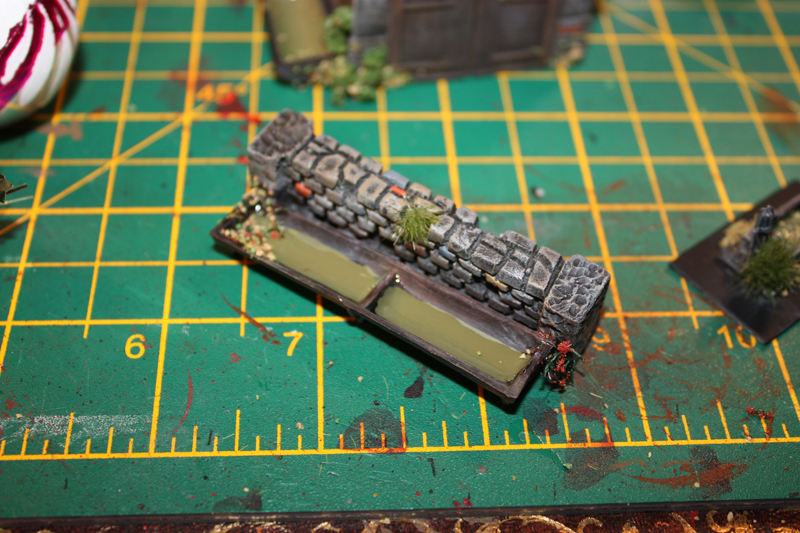
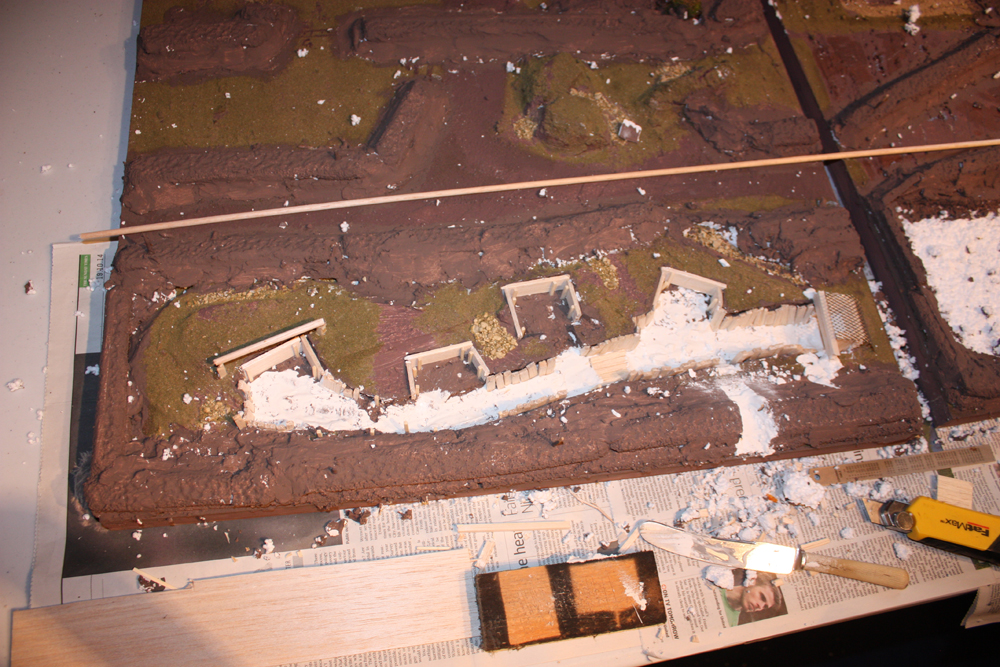
Step 6 : I now glued the finished walls to the plasticard

base in the carefully marked out locations. I also glued the

gate in place.
IMG_7531a

Once dry I used light household filler to

build up the ground to the walls and normal base scatter/grit

for the farm yard floor. The farm floor was drybrushed Flat Brown,

then Baneblade brown and finally Dawnstone.

IMG_7578a

The wooden fence at

the rear was scratch built from balsa. The hay is made from

door mat bristles.

Nearly forgot I used green stuff to fill in any gaps in the

walls and then painted as described earlier.

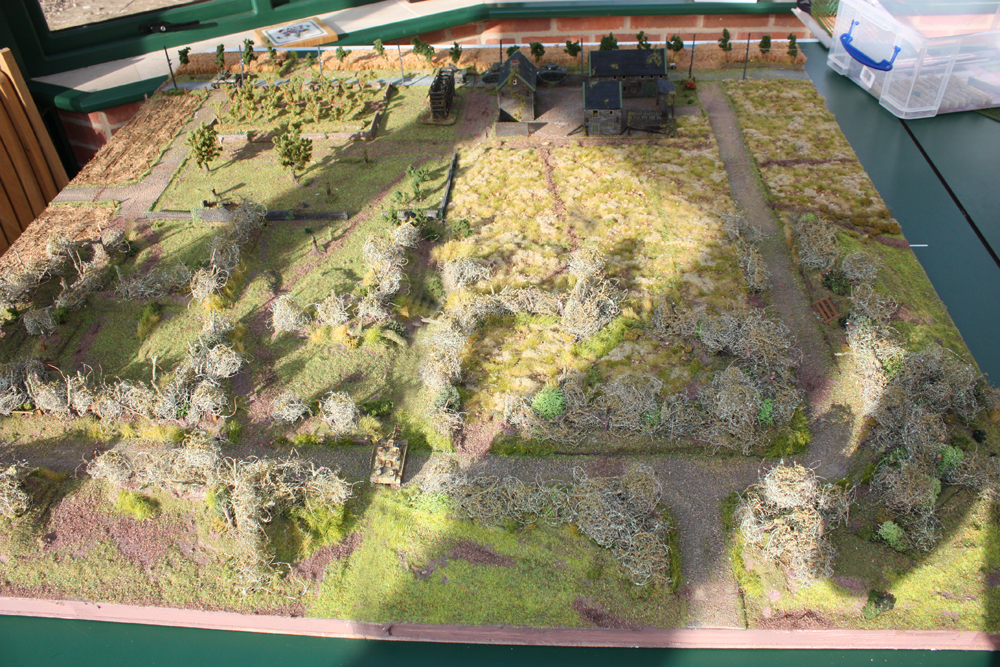
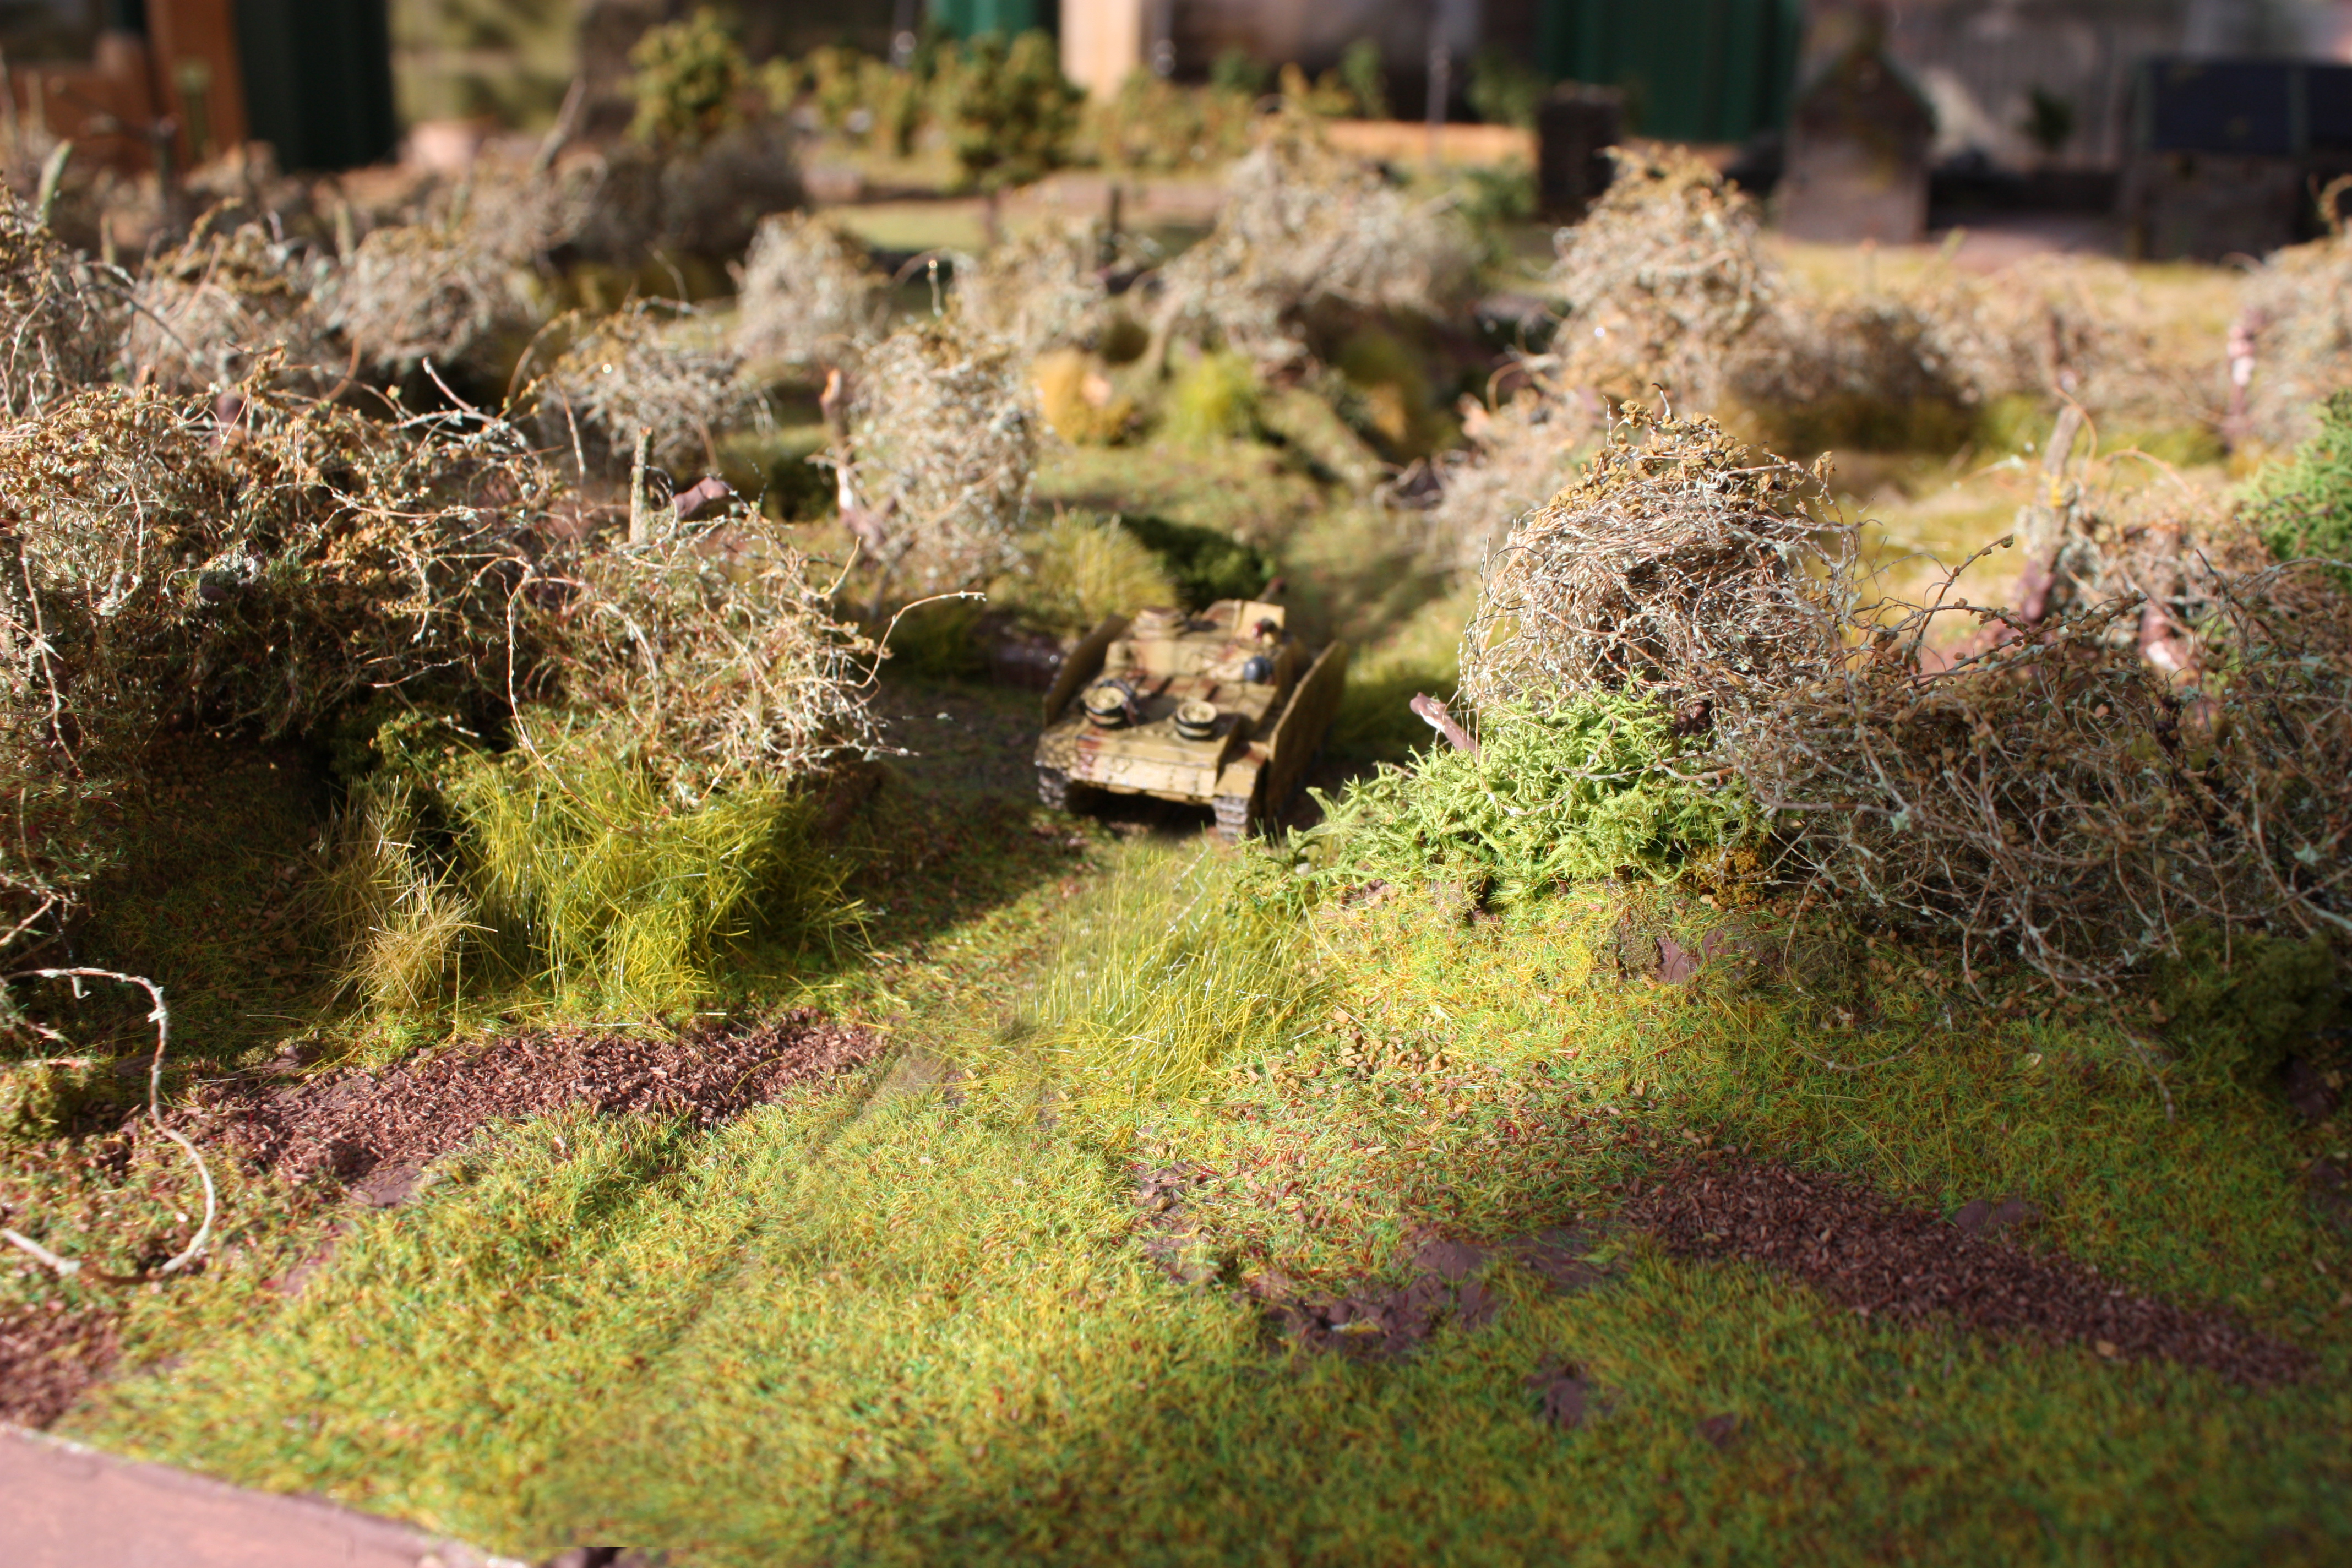
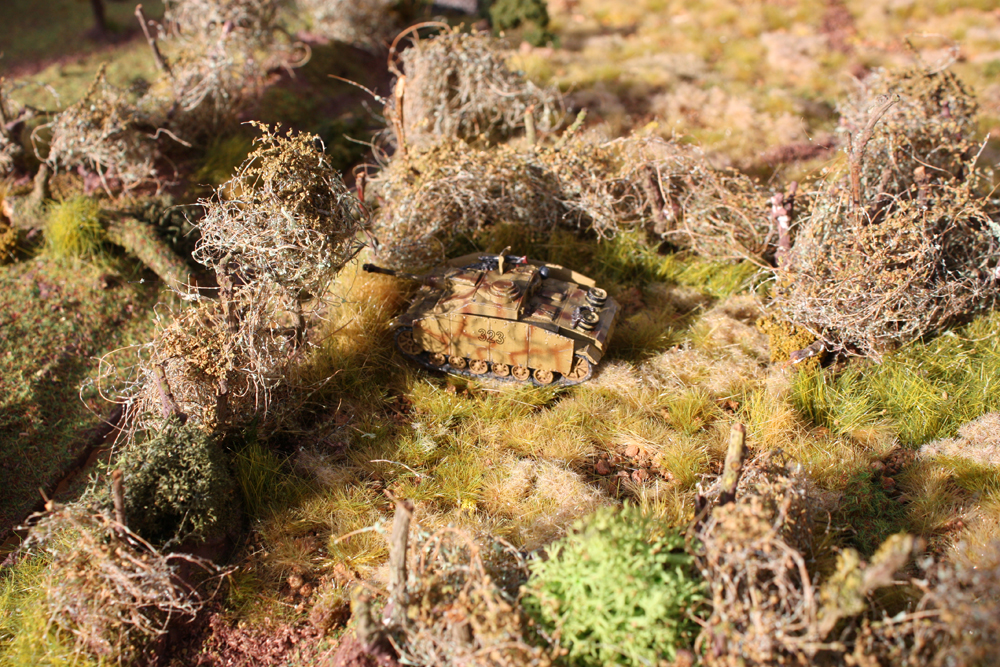
Step 7 : Foliage. I now added foliage as desired . Most of

the foliage is from Treemendus and is stuck on with PVA glue.

IMG_7729a

Step 8: The fascia boards(roof edging) were made from

Plasticard right angle and painted Loren Forest. Simply stick

on with glue. I also played with the idea on using artist

foil on the top of the roof but never got round to it. It

looks just like lead when painted up.

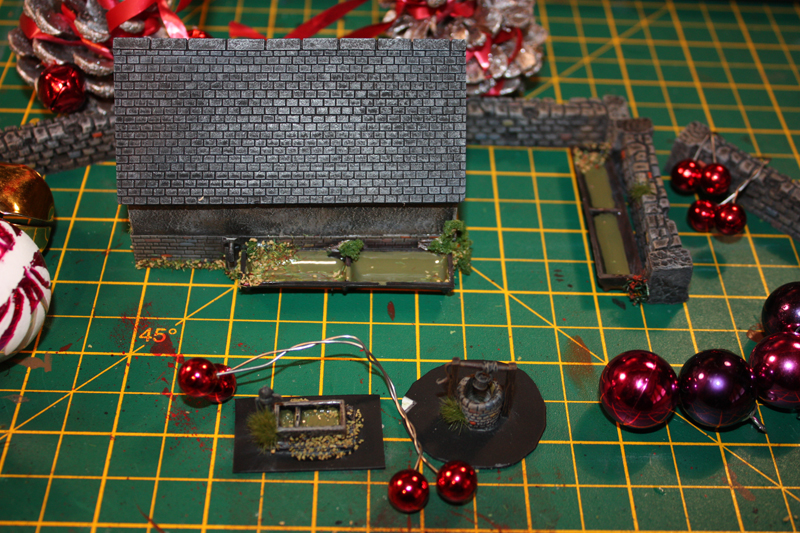
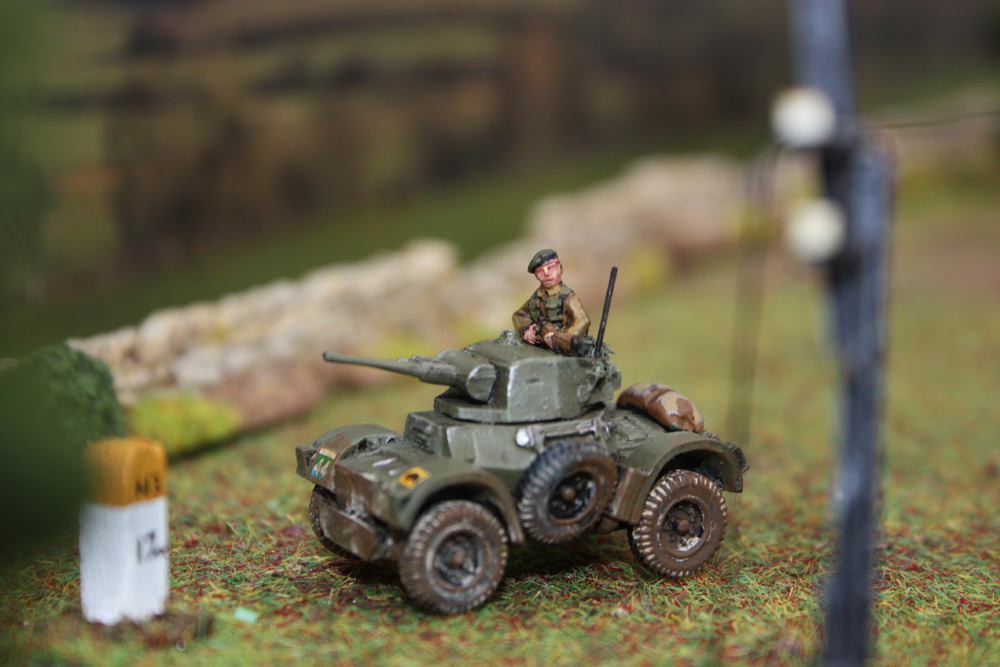
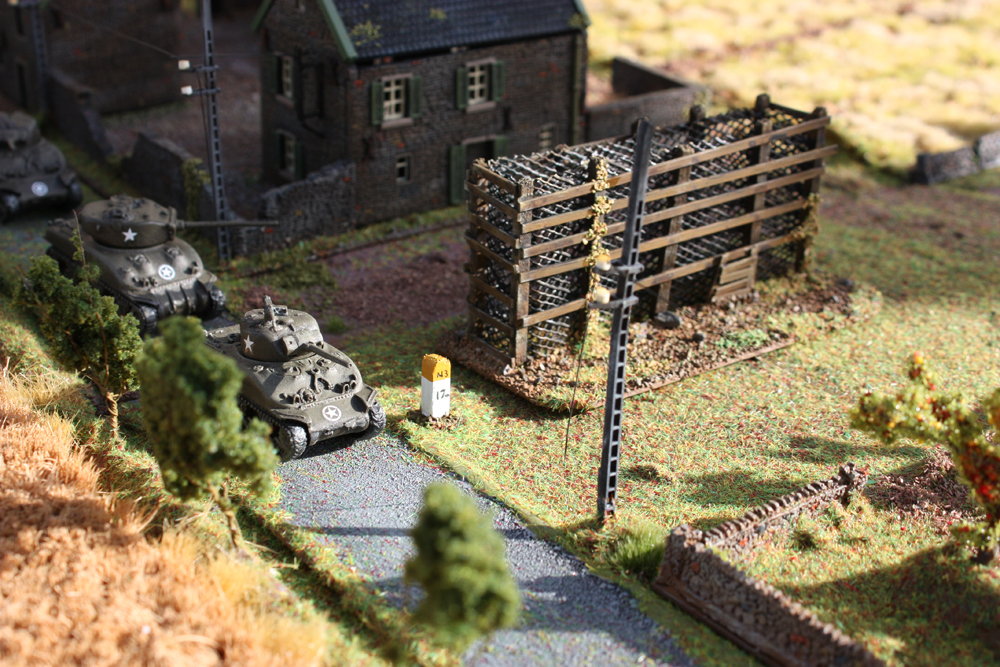
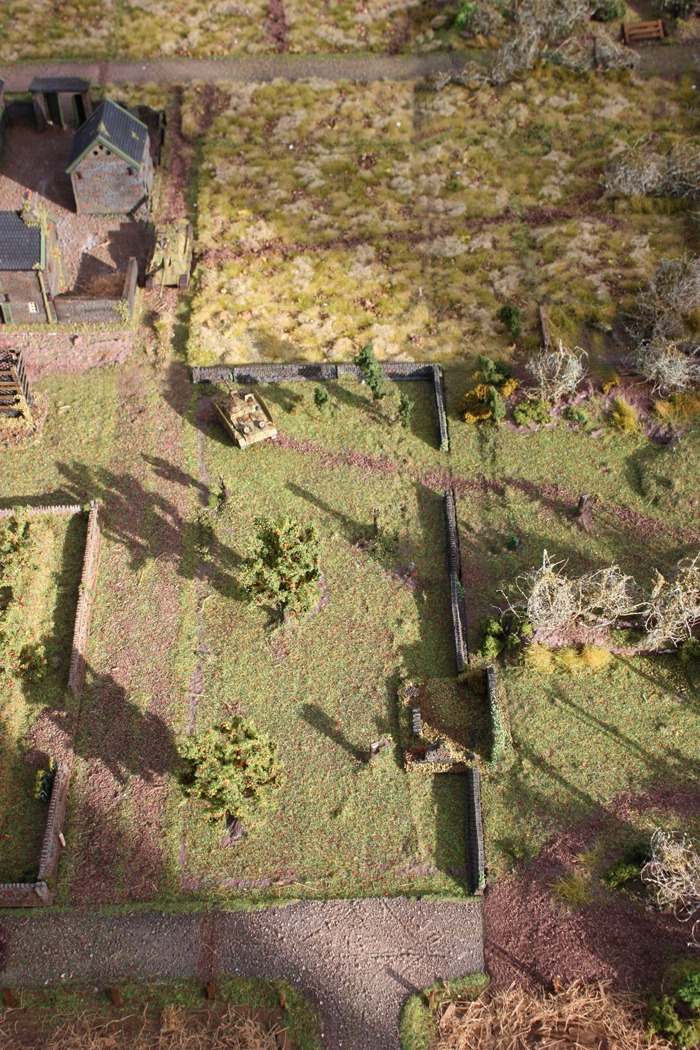
Step 9 : The telegraph poles are from Foreground(concrete

style) and were stuck down with filler and blended in with

foliage. They were painted black and then dry brushed Dawn

stone. The telephone wire is Oasis galvanised hobby wire

(30G x 7) and is cunningly attached. There is a scratch

built joint on the side of the farm house and the wire is

not glued to the telegraph pole but has enough tension to

easily be clipped to the pole. In the picture below the

wire is glued to the house wall(right red arrow) and goes

through the joint and then rests on the telegraph

pole(left red arrow) looking for all intense

purposes to be joined.

IMG_7816a

I used the same method at

each end of the plasticard base so you can lift the

plasticard base up and you don’t rip the poles out.

In the picture below the red arrows are where the wire

joins. Its not glued in place but just resting. Its glued

at the poles left and right of the arrows so the plasticard

can be easily lifted up.

IMG_7857a

The wire

basically has enough spring and tension to hold itself up.

Where the wire is attached I used good old super glue.

I`m sure there are a few bits left out so feel free to

ask any questions and I hope it helps 🙂

More or less finished the four boards. Think I`m

going to do another two with some trenches and

room for a le FH 18 battery.

This post is pic heavy and just click on any

image to enlarge.

IMG_7771a

IMG_7773a

IMG_7774a

IMG_7779a

IMG_7785a

IMG_7793a

IMG_7796a

IMG_7805a

IMG_7809a

IMG_7826a

IMG_7834a

IMG_7836a

IMG_7838a

IMG_7842a

IMG_7843a

I have been playing around with the camera and

some standard model railway backdrops and this

photo just stood out for me.

“M18 waiting for the Mortain counter attack 1944.”

Just click on the piccy to enlarge.

IMG_7803a

A certain person with lots of trees on their blog

has inspired me 🙂

IMG_7709a

As you can see I`m making sure my British 11th

Armoured have an answer to the Panzer Lehr

oncoming onslaught. M10`s with 17pdrs plus

a few extra bits including another Hellcat and

a Sexton.

The crews are still work in progress. Not long

until finished.